Database Backups
You can back up your databases managed by Appliku through the dashboard. Backups can be stored on the server or uploaded to S3-compatible storage.
Cluster vs. Standalone Backups
Backups for standalone datastores run a one-shot container on the chosen backup server, attached to the local applications Docker network. The backup server must be the same server that hosts the datastore when the connection mode is private_connection_url.
Backups for cluster-deployed datastores run a one-shot container attached to the cluster's proxy overlay network, so they can run on any active, set-up server in the same cluster — not necessarily the DB-pinned node. The backup server selector is validated to enforce this. Local backup artifacts and S3 uploads still happen on whichever server runs the cron job, so changing the backup server reschedules the cron on the new server and removes the stale cron entry from the previous one.
How to Back Up a PostgreSQL Database
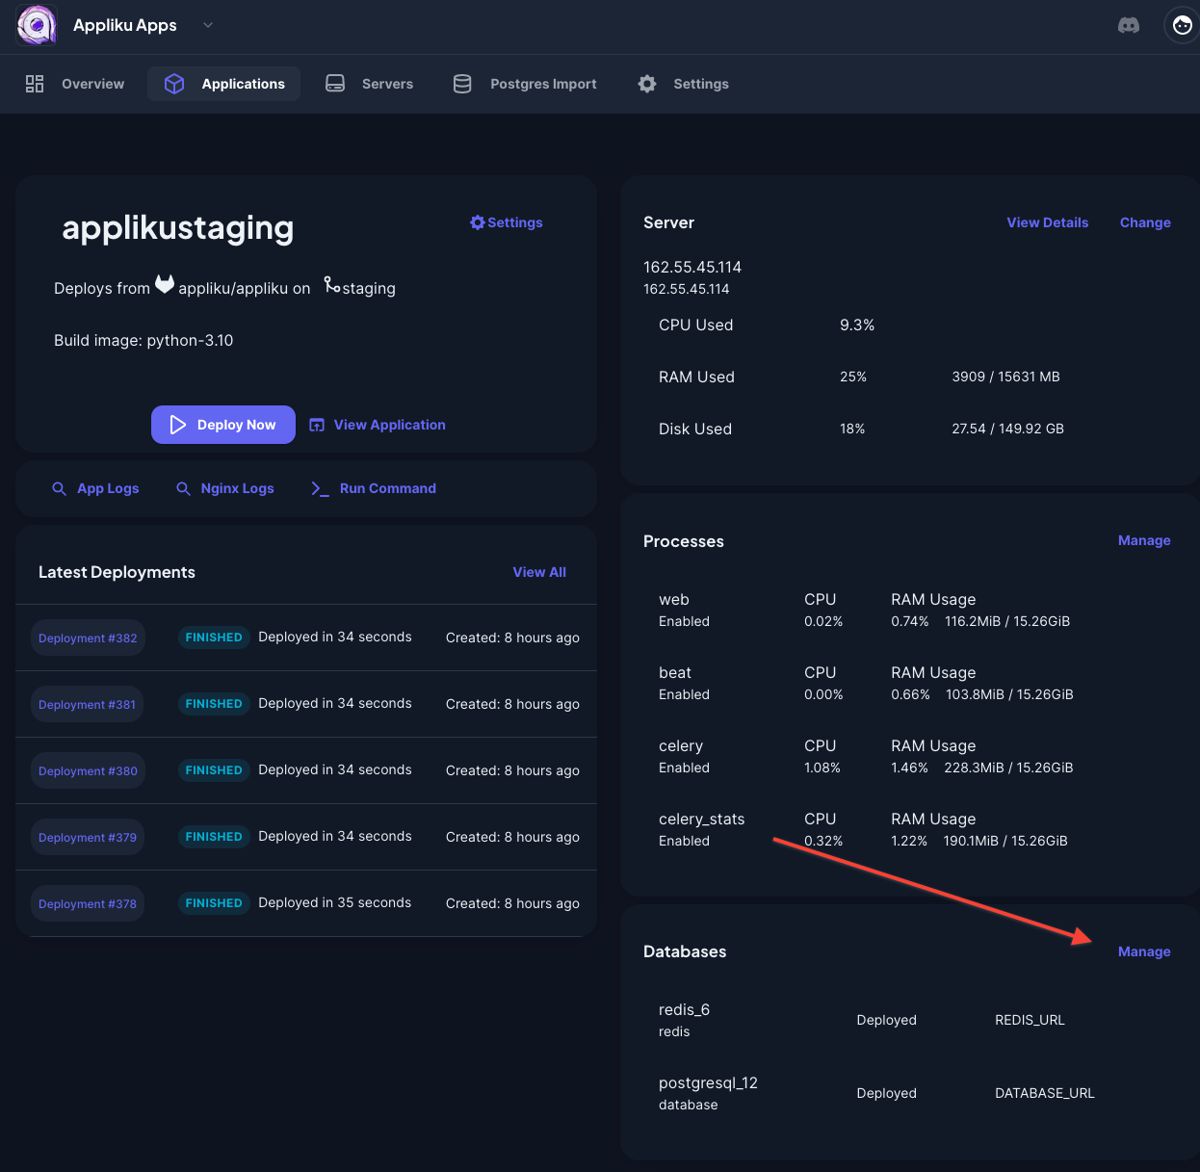
- Open the Appliku dashboard
- Go to your application that has a database
- Click on the "Manage" link in the "Databases" card:
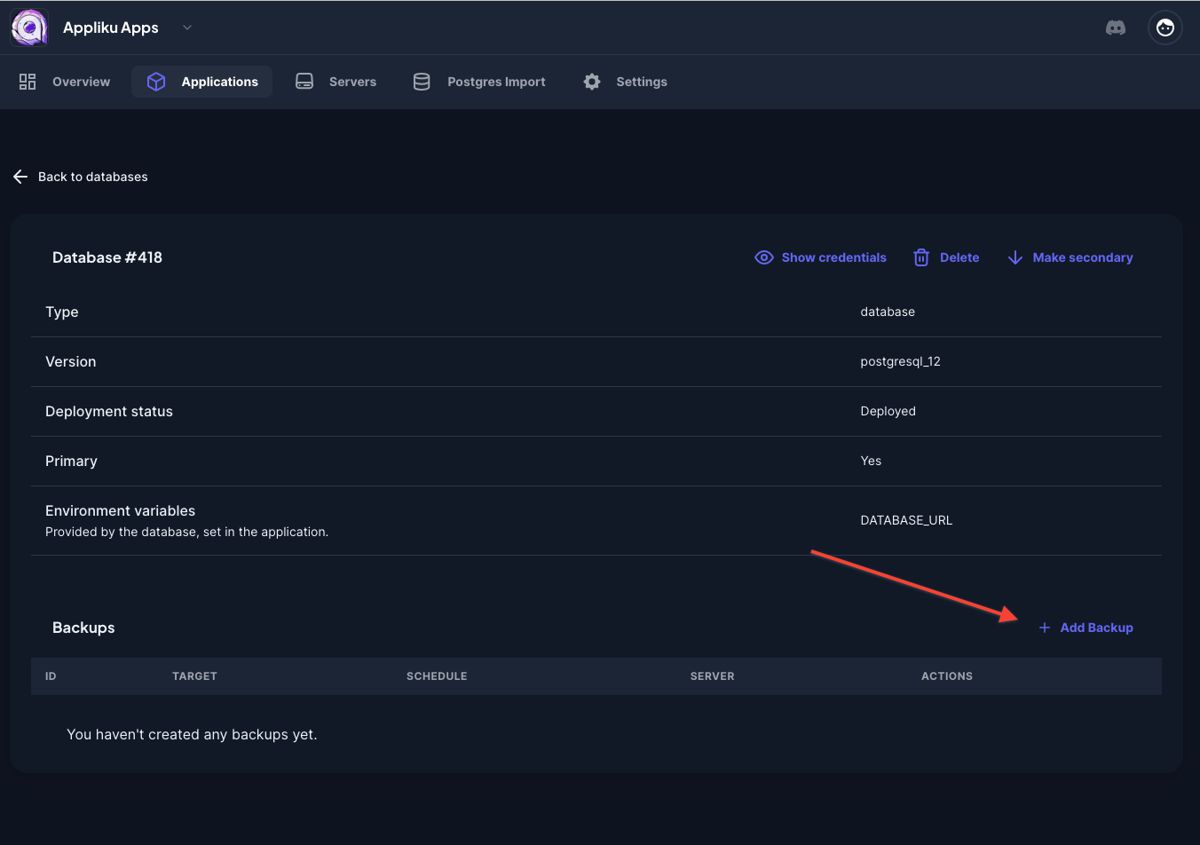
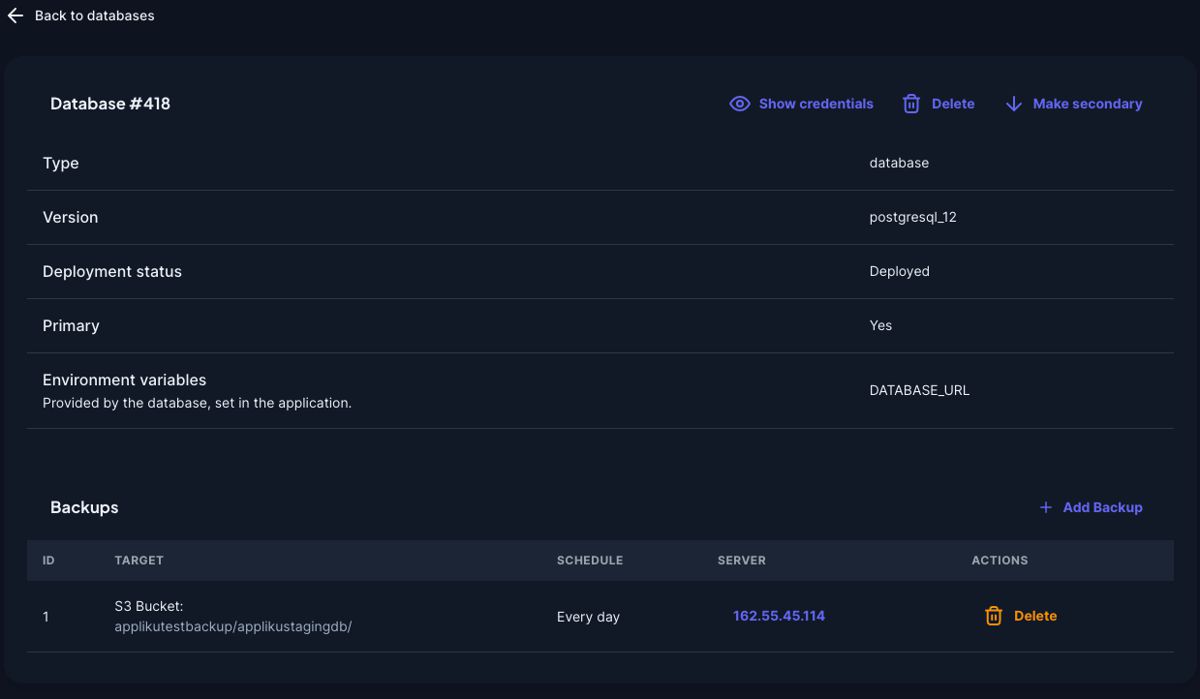
- Pick your database
- Click on the "Add backup" link:
- Specify parameters for the backup:
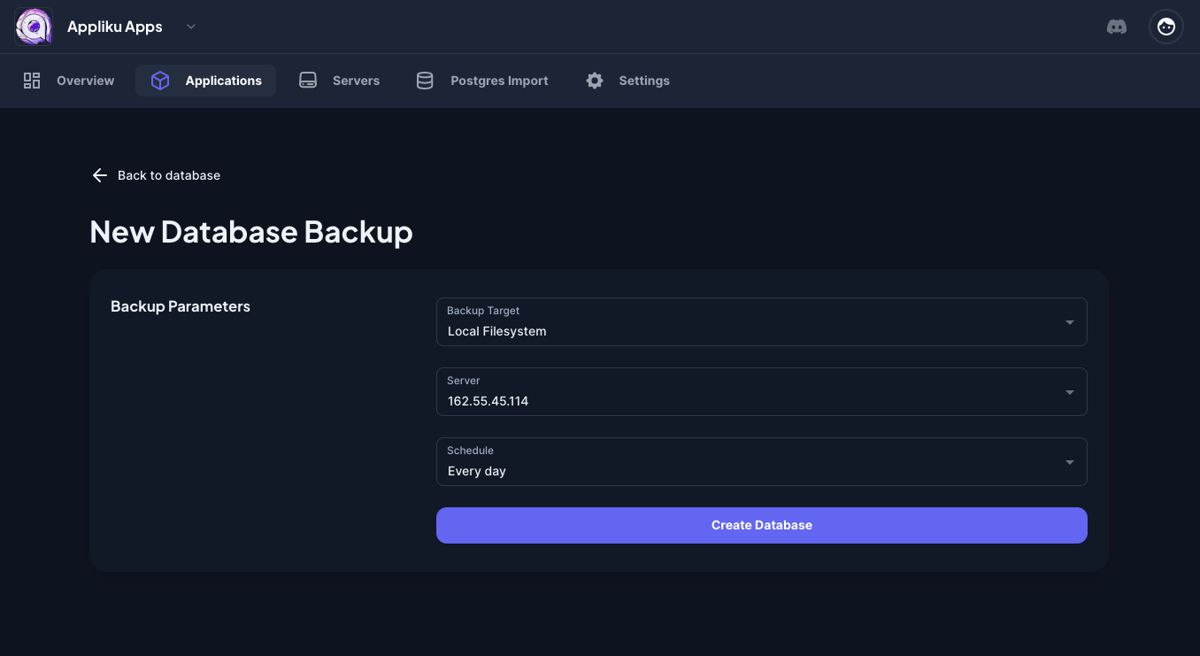
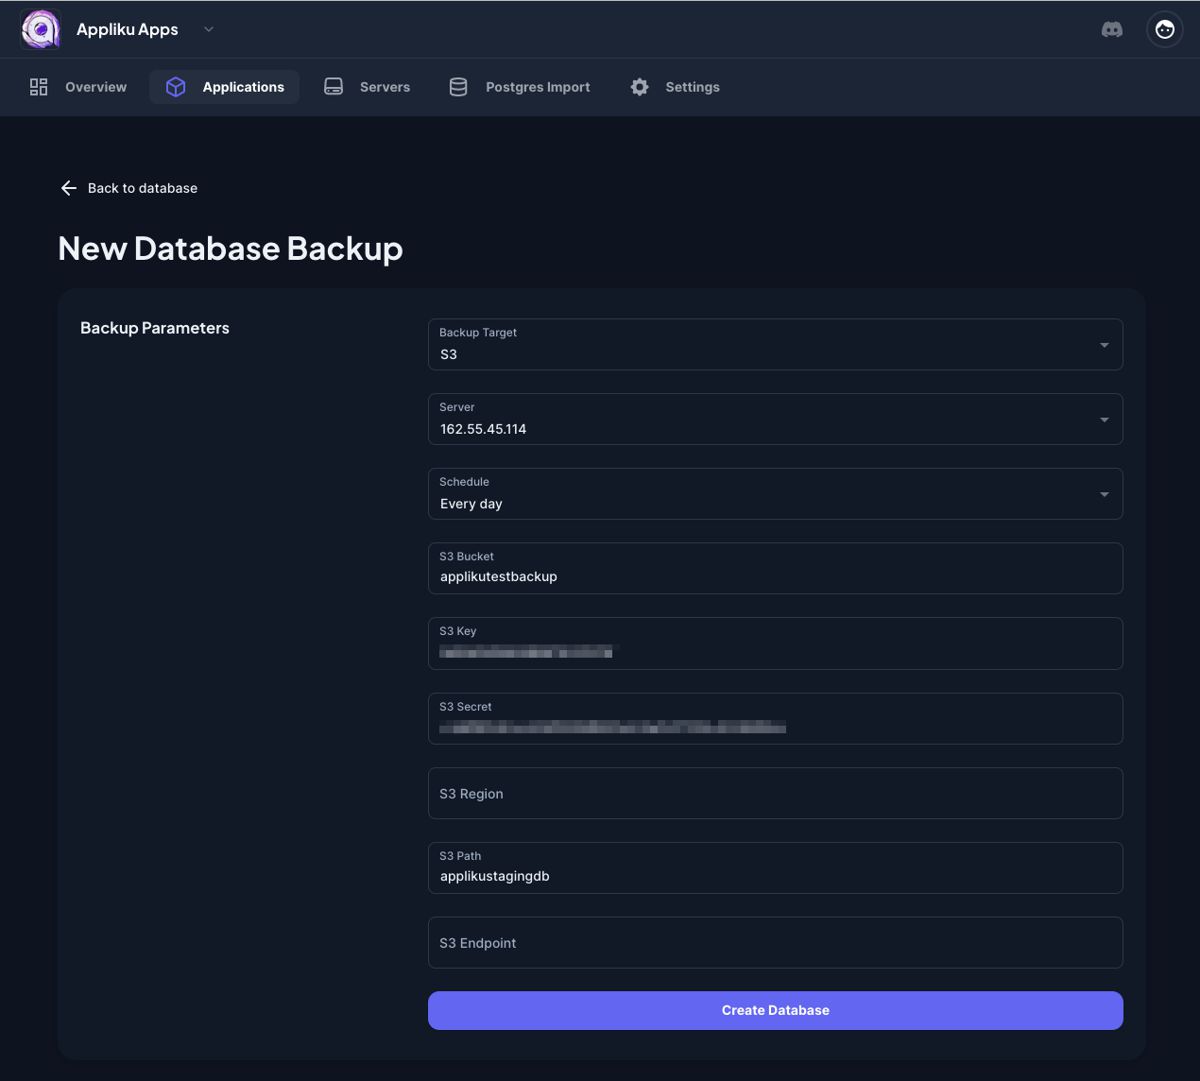
Available schedule intervals range from every 30 minutes to daily. For object storage, pick one of the supported providers and supply the credentials for it: most settings (including the endpoint URL) are filled in for you.
Object Storage Providers
When you choose Object Storage (S3-compatible) as the backup target, pick one of the providers below and follow the matching setup section. The form fills in as much as it can automatically: the endpoint URL is derived from the region or the account ID for every preset, so you only need to supply the bucket and the credentials.
The sections that follow walk through creating the bucket and the credentials with each provider, then map the values onto the fields shown in the Appliku backup form.
Amazon S3
- Create an AWS account at aws.amazon.com if you don't have one.
- In the AWS Console, open S3 and click Create bucket. Pick a unique bucket name and a region. Block all public access unless you have a specific reason not to. Keep the region handy.
- Open IAM, go to Users, click Create user, and give it programmatic access.
- Attach an inline policy that allows
s3:PutObject,s3:GetObject,s3:DeleteObject, ands3:ListBucketonarn:aws:s3:::your-bucketandarn:aws:s3:::your-bucket/*. Avoid using a full-access policy. - After creating the user, open it and create an Access key. Copy the access key ID and secret access key once; AWS does not show the secret again.
Then fill in the backup form:
| Field | Value |
|---|---|
| Storage Provider | Amazon S3 |
| Bucket | The S3 bucket name |
| Region | The AWS region you created the bucket in (e.g. us-east-1) |
| Access Key ID | The IAM user's access key ID |
| Secret Access Key | The IAM user's secret access key |
| Path Prefix | Optional folder inside the bucket (e.g. appliku-backups) |
The endpoint is selected automatically from the region.
DigitalOcean Spaces
- Sign in to DigitalOcean and open Spaces Object Storage.
- Click Create a Spaces Bucket, pick a datacenter region (e.g.
nyc3,fra1,sfo3), choose a unique Space name, and enable Restrict File Listing. - Open API in the left sidebar and scroll to Spaces Keys. Click Generate New Key, give it a name, and copy the access key and secret. The secret is shown only once.
Then fill in the backup form:
| Field | Value |
|---|---|
| Storage Provider | DigitalOcean Spaces |
| Space Name | The Space name you created |
| Region | The datacenter slug (e.g. nyc3, fra1, sfo3) |
| Spaces Access Key | The Spaces access key |
| Spaces Secret Key | The Spaces secret key |
| Path Prefix | Optional folder inside the Space |
The endpoint resolves to https://{region}.digitaloceanspaces.com automatically.
Cloudflare R2
- In the Cloudflare dashboard, open R2 Object Storage. If R2 is not yet enabled on the account, accept the terms; R2 has a generous free tier and you can use it without entering payment details until you exceed it.
- Click Create bucket, pick a unique name and a location hint, and create the bucket.
- Open Manage R2 API Tokens (top right on the R2 overview page). Click Create API Token, choose Object Read & Write, scope it to the bucket you just created, and create the token.
- On the token page, copy the Access Key ID and Secret Access Key. Cloudflare also shows your Account ID in the right sidebar of the R2 page; copy that too.
Then fill in the backup form:
| Field | Value |
|---|---|
| Storage Provider | Cloudflare R2 |
| Bucket | The R2 bucket name |
| Cloudflare Account ID | The account ID from the R2 overview page |
| R2 Access Key ID | From the R2 API Token |
| R2 Secret Access Key | From the R2 API Token |
| Path Prefix | Optional folder inside the bucket |
The endpoint resolves to https://{account_id}.r2.cloudflarestorage.com automatically. R2 does not use regions; Appliku signs requests with auto for you.
Wasabi
- Sign up at wasabi.com and confirm the account.
- In the Wasabi console, open Buckets and click Create Bucket. Pick a unique name and a region from the dropdown. Wasabi region codes match Appliku's options (e.g.
us-east-1,eu-central-1,ap-northeast-1). - Open Access Keys, click Create New Access Key, choose Root User (or a user you created under Users & Groups with bucket permissions), and download the keys. The secret is shown only at creation.
Then fill in the backup form:
| Field | Value |
|---|---|
| Storage Provider | Wasabi |
| Bucket | The Wasabi bucket name |
| Region | The Wasabi region of the bucket |
| Access Key ID | The Wasabi access key |
| Secret Access Key | The Wasabi secret key |
| Path Prefix | Optional folder inside the bucket |
The endpoint is selected from Wasabi's per-region service URLs automatically. Some Wasabi regions have non-standard endpoints (notably us-east-1 uses s3.wasabisys.com with no region in the hostname), so always use the dropdown rather than typing a region by hand.
Custom S3-compatible
The Custom S3-compatible option works with any service that exposes the AWS S3 API, including self-hosted MinIO, SeaweedFS, Garage, Backblaze B2 (S3 API), Hetzner Object Storage, OVH Cloud Object Storage, Scaleway Object Storage, and any other compatible provider.
Each service has its own console, but the steps are always the same:
- Create a bucket in the provider's console.
- Generate an S3-compatible access key and secret key with read/write/list/delete permissions on that bucket.
- Look up the endpoint URL the provider exposes for the S3 API; this is the value the AWS CLI would pass as
--endpoint-url. Examples:https://s3.eu-central-1.example.com,https://gateway.storjshare.io, or for a self-hosted MinIO on a private network something likehttp://minio.internal:9000.
Then fill in the backup form:
| Field | Value | Notes |
|---|---|---|
| Storage Provider | Custom S3-compatible | |
| Bucket | The bucket name | |
| Region | Optional region label | Set this if your provider requires a region in the signature (e.g. us-east-1). Leave empty otherwise. |
| Endpoint URL | The provider's S3 endpoint | Must include the scheme. Both http:// and https:// are accepted; use http:// only for private networks. A trailing slash is stripped automatically, so https://endpoint.example.com/ and https://endpoint.example.com are equivalent. |
| Access Key ID | The S3-compatible access key | |
| Secret Access Key | The S3-compatible secret key | |
| Path Prefix | Optional folder inside the bucket | Leading and trailing slashes are added automatically; backups, /backups, backups/, and /backups/ all save as /backups/. |
| Addressing Style | Auto, Virtual-hosted, or Path |
Most managed services accept Auto. Pick Path if your provider requires path-style URLs (https://endpoint/bucket/key rather than https://bucket.endpoint/key); self-hosted MinIO and SeaweedFS typically need this. |
If you are unsure whether Auto, Virtual-hosted, or Path is right, run Test Storage with Auto first; if it fails with a DNS or NoSuchBucket error, switch to Path and try again.
Test Storage Before Saving
Each remote backup form has a Test Storage button that uploads a tiny test file from the selected server and deletes it on success. The button uses the same Docker image and credentials as the scheduled backup, so a passing test confirms the backup will be able to write to the destination. The test must pass before you can create a new remote backup, and the form will ask for a fresh test if you change storage settings on an existing backup.
Local Storage Retention
When using Local Filesystem as the backup target, you can set Keep Last N Backups to automatically delete old backup files and keep only the most recent N copies. For example, setting it to 7 keeps the last 7 backup files and removes older ones.
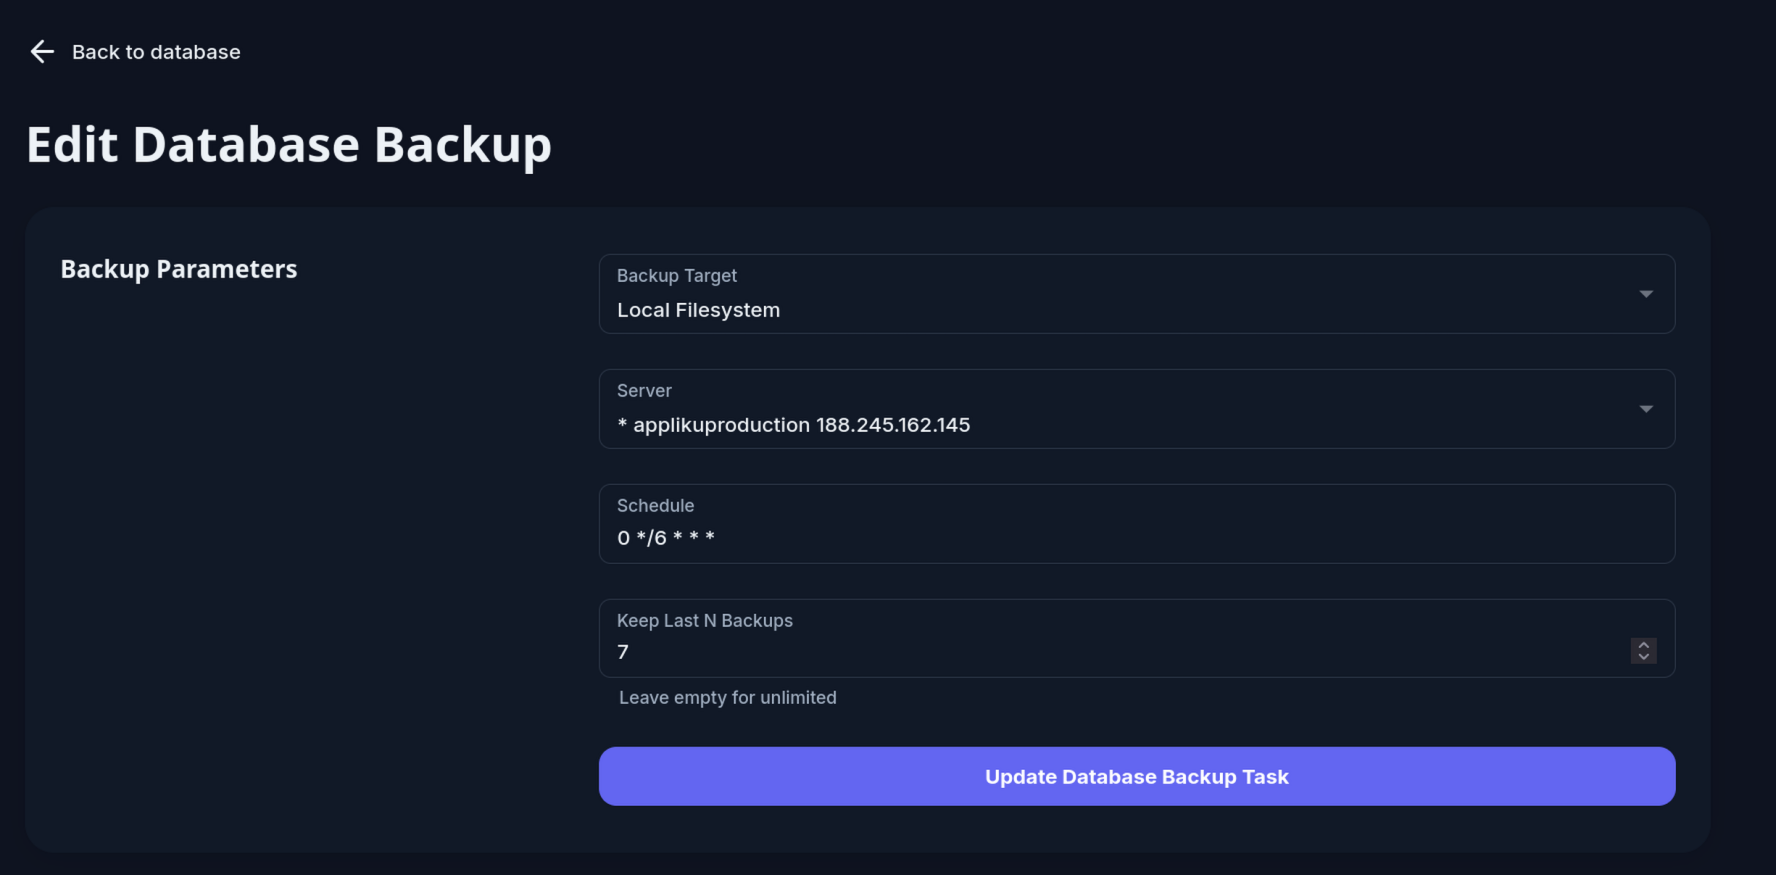
Leave the field empty to keep all backups with no automatic deletion.
Retention is applied automatically every 6 hours by Appliku. Backup files for S3 targets are not affected — those are removed from the server immediately after upload.
- After submitting the form you will be taken back to the database page with your new backup task:
View Backup Logs and Files
Open a backup task from the backups table to inspect its latest runtime information.
The backup detail page shows the last 200 lines from the backup job log on the server:
For Local Filesystem backups, the page also lists the latest compressed backup files from:
The file list shows server paths, file sizes, and modification times. S3 backups show the configured bucket and path instead of local server files.
Backup Command Details
The pg_dump command used to perform backups looks like this:
What these arguments do:
--no-privileges— Excludes permissions/privileges from the dump file--no-owner— Excludes ownership information from the dump file--no-acl— Excludes access control lists from the dump file
Backup to File
To store a PostgreSQL backup into a compressed file:
Backup from Docker Container
Since PostgreSQL runs in a Docker container, the full command looks like this:
docker run --rm --network applications -e DATABASE_URL=<postgres_url> \
  -v /home/app/_backups/{backup_id}:/backup postgres:15 sh -c \
  "pg_dump --no-privileges --no-owner --no-acl \"$DATABASE_URL\" | gzip > /backup/<export_filename>"
What each part does:
docker run --rm— Starts a temporary container that is removed after it exits--network applications— Connects the backup container to the same Docker network as the database-e DATABASE_URL=...— Passes the selected database connection URL into the backup container-v /home/app/_backups/{backup_id}:/backup— Mounts the backup directory from the host into the containerpostgres:15— Uses the official PostgreSQL 15 Docker image- The shell command runs
pg_dump, pipes throughgzip, and saves to the mounted backup directory
Backup Connection Modes
Backups can connect to PostgreSQL in three modes:
- Connection URL uses the public database URL. This mode is available only when external connections are enabled for the database.
- Private Connection URL uses the internal Docker network URL. The backup task must run on the same server as the database.
- Custom lets you provide a PostgreSQL URL manually. If external connections are disabled for the database, the backup task still must run on the database server.
For databases with external connections disabled, new backup tasks default to Private Connection URL and run on the database server.
Restore from Backup
To restore a PostgreSQL database from a backup file:
- Download the backup file
- Uncompress it:
- Import to the database using
psql: