How to Deploy Django to Production (2026)
This guide covers everything you need to deploy a Django application to production: environment variables, PostgreSQL, Gunicorn, static files with Whitenoise, persistent volumes, and HTTPS — all automated by Appliku. Appliku handles server setup so you can deploy in 15 minutes, at 60–80% less than Heroku, on your own infrastructure.
For cloud-specific setup, see: - Deploy Django on Hetzner Cloud — the most popular choice among Appliku users - Heroku alternative for Django — full cost comparison
In this tutorial you will learn how to start a Django project, prepare it for deployment, and deploy it with Appliku on your own VPS cloud server.
Django Project
Starting a Django Project
To start a new Django project you will need Python 3.12, 3.13 or 3.14 — those are the versions Django 6.0 supports.
This tutorial assumes you are working in a Linux or Mac terminal. If you are on Windows, install WSL.
I strongly recommend using Docker for your development environment, so please check Django Docker Tutorial with Postgres.
This guide uses uv — a fast, modern Python package manager. If you don't have it installed, run:
Then create your project:
mkdir mydjangoproject
cd mydjangoproject
uv init --bare
uv add Django==6.0.7 django-environ==0.14.0 gunicorn==26.0.0 "psycopg[binary]==3.3.4" whitenoise==6.12.0 Pillow
uv run django-admin startproject project .
This creates pyproject.toml and uv.lock — commit both to version control.
The uv build images install your dependencies with uv sync --frozen from those two files, so uv.lock must be committed and in sync with pyproject.toml or the build will fail. Adding a dependency later is just uv add some-package, which updates both files — commit them together.
Tip
uv init writes a requires-python into pyproject.toml based on the Python you have locally. Make sure it is compatible with the build image you pick below — e.g. requires-python = ">=3.12" works on the Python 3.14 image, but ">=3.14" would fail on a 3.12 image.
Open your project in your favorite code editor.
Using environment variables in Django configuration
Let's edit project/settings.py to make our Django project respect environment variables.
We need this to avoid hardcoding sensitive data like credentials.
We will be passing via environment variables the following things:
- SECRET_KEY
- DATABASE_URL, which will populate Django's DATABASES object that is used to connect to the database
- DEBUG
- ALLOWED_HOSTS
- MEDIA_URL and MEDIA_ROOT for media files
Add environ import, so your imports section looks like this:
Create env object and use it to get the rest of the key settings:
env = environ.Env(
# set casting, default value
DEBUG=(bool, False)
)
BASE_DIR = Path(__file__).resolve().parent.parent
# Take environment variables from .env file
environ.Env.read_env(os.path.join(BASE_DIR, ".env"))
SECRET_KEY = env("SECRET_KEY", default="change_me")
DEBUG = env.bool("DEBUG", default=False)
ALLOWED_HOSTS = env.list("ALLOWED_HOSTS", default=["*"])
Scroll down and replace the DATABASES with this definition:
Add SECURE_PROXY_SSL_HEADER so Django can detect being behind a secure proxy.
Add a LOGGING setting to make Django write all logs to stdout, where Appliku picks them up for application logs. The level is read from an env var so you can turn on verbose logging in production without a code change.
LOGGING = {
"version": 1,
"disable_existing_loggers": False,
"handlers": {"console": {"class": "logging.StreamHandler"}},
"loggers": {"": {"handlers": ["console"], "level": env.str("LOG_LEVEL", default="INFO")}},
}
Serving static files with the whitenoise library
Edit the MIDDLEWARE list and add 'whitenoise.middleware.WhiteNoiseMiddleware', directly after SecurityMiddleware. The order matters — WhiteNoise must come first, right below the security middleware:
MIDDLEWARE = [
'django.middleware.security.SecurityMiddleware',
'whitenoise.middleware.WhiteNoiseMiddleware', # <-- here
'django.contrib.sessions.middleware.SessionMiddleware',
'django.middleware.common.CommonMiddleware',
'django.middleware.csrf.CsrfViewMiddleware',
'django.contrib.auth.middleware.AuthenticationMiddleware',
'django.contrib.messages.middleware.MessageMiddleware',
'django.middleware.clickjacking.XFrameOptionsMiddleware',
]
Set STATIC settings:
STATIC_URL = env.str("STATIC_URL", default="/static/")
STATIC_ROOT = env.str("STATIC_ROOT", default=BASE_DIR / "staticfiles")
More whitenoise configuration:
You do not need to run collectstatic yourself: the Python build images detect manage.py and run python manage.py collectstatic --noinput during the build. Set the DISABLE_COLLECTSTATIC=1 environment variable if you ever need to skip it.
Media files
Set these two settings to work with local files for media.
MEDIA_ROOT = env("MEDIA_ROOT", default=BASE_DIR / "media")
MEDIA_URL = env("MEDIA_URL", default="/media/")
In order for media files to function properly you will need to add a persistent volume later in Appliku app settings.
Complete settings.py
"""
Django settings for project project.
Generated by 'django-admin startproject' using Django 6.0.7.
For more information on this file, see
https://docs.djangoproject.com/en/6.0/topics/settings/
For the full list of settings and their values, see
https://docs.djangoproject.com/en/6.0/ref/settings/
"""
from pathlib import Path
import environ
import os
env = environ.Env(
    # set casting, default value
    DEBUG=(bool, False)
)

BASE_DIR = Path(__file__).resolve().parent.parent
# Take environment variables from .env file
environ.Env.read_env(os.path.join(BASE_DIR, ".env"))

SECRET_KEY = env("SECRET_KEY", default="change_me")

DEBUG = env.bool("DEBUG", default=False)

ALLOWED_HOSTS = env.list("ALLOWED_HOSTS", default=["*"])
# Application definition
INSTALLED_APPS = [
'django.contrib.admin',
'django.contrib.auth',
'django.contrib.contenttypes',
'django.contrib.sessions',
'django.contrib.messages',
'django.contrib.staticfiles',
]
MIDDLEWARE = [
'django.middleware.security.SecurityMiddleware',
'whitenoise.middleware.WhiteNoiseMiddleware',
'django.contrib.sessions.middleware.SessionMiddleware',
'django.middleware.common.CommonMiddleware',
'django.middleware.csrf.CsrfViewMiddleware',
'django.contrib.auth.middleware.AuthenticationMiddleware',
'django.contrib.messages.middleware.MessageMiddleware',
'django.middleware.clickjacking.XFrameOptionsMiddleware',
]
ROOT_URLCONF = 'project.urls'
TEMPLATES = [
{
'BACKEND': 'django.template.backends.django.DjangoTemplates',
'DIRS': [],
'APP_DIRS': True,
'OPTIONS': {
'context_processors': [
'django.template.context_processors.debug',
'django.template.context_processors.request',
'django.contrib.auth.context_processors.auth',
'django.contrib.messages.context_processors.messages',
],
},
},
]
WSGI_APPLICATION = 'project.wsgi.application'
# Database
# https://docs.djangoproject.com/en/6.0/ref/settings/#databases
DATABASES = {
    "default": env.db(default="sqlite:///db.sqlite3"),
}
# Password validation
# https://docs.djangoproject.com/en/6.0/ref/settings/#auth-password-validators
AUTH_PASSWORD_VALIDATORS = [
{
'NAME': 'django.contrib.auth.password_validation.UserAttributeSimilarityValidator',
},
{
'NAME': 'django.contrib.auth.password_validation.MinimumLengthValidator',
},
{
'NAME': 'django.contrib.auth.password_validation.CommonPasswordValidator',
},
{
'NAME': 'django.contrib.auth.password_validation.NumericPasswordValidator',
},
]
SECURE_PROXY_SSL_HEADER = ("HTTP_X_FORWARDED_PROTO", "https")
LOGGING = {
    "version": 1,
    "disable_existing_loggers": False,
    "handlers": {"console": {"class": "logging.StreamHandler"}},
    "loggers": {"": {"handlers": ["console"], "level": env.str("LOG_LEVEL", default="INFO")}},
}
# Internationalization
# https://docs.djangoproject.com/en/6.0/topics/i18n/
LANGUAGE_CODE = 'en-us'
TIME_ZONE = 'UTC'
USE_I18N = True
USE_TZ = True
# Static files (CSS, JavaScript, Images)
# https://docs.djangoproject.com/en/6.0/howto/static-files/
STATIC_URL = env.str("STATIC_URL", default="/static/")
STATIC_ROOT = env.str("STATIC_ROOT", default=BASE_DIR / "staticfiles")
WHITENOISE_USE_FINDERS = True
WHITENOISE_AUTOREFRESH = DEBUG
MEDIA_ROOT = env("MEDIA_ROOT", default=BASE_DIR / "media")
MEDIA_URL = env("MEDIA_URL", default="/media/")
Create a Django app and the first view
Create your Django app:
Add it to INSTALLED_APPS:
INSTALLED_APPS = [
    'django.contrib.admin',
    'django.contrib.auth',
    'django.contrib.contenttypes',
    'django.contrib.sessions',
    'django.contrib.messages',
    'django.contrib.staticfiles',
    'mainapp',
]
Create a view in mainapp/views.py:
Edit project/urls.py to include this view as the root one:
from django.contrib import admin
from django.urls import path
from mainapp import views # <-- new

urlpatterns = [
    path('', views.mainapp_page), # <-- new
    path('admin/', admin.site.urls),
]
Management command to create a superuser
Create a folder in your new app mainapp/management, then mainapp/management/commands.
In both folders create empty files __init__.py. This makes them importable Python packages.
Create a file mainapp/management/commands/makesuperuser.py with the following content:
from django.contrib.auth import get_user_model
from django.core.management.base import BaseCommand
from django.utils.crypto import get_random_string

User = get_user_model()


class Command(BaseCommand):
    def handle(self, *args, **kwargs):
        email = 'admin@example.com'
        new_password = get_random_string(10)
        try:
            if not User.objects.filter(is_superuser=True).exists():
                self.stdout.write("No superusers found, creating one")
                User.objects.create_superuser(username='admin', email=email, password=new_password)
                self.stdout.write("=======================")
                self.stdout.write("A superuser has been created")
                self.stdout.write("Username: admin")
                self.stdout.write(f"Email: {email}")
                self.stdout.write(f"Password: {new_password}")
                self.stdout.write("=======================")
            else:
                self.stdout.write("A superuser exists in the database. Skipping.")
        except Exception as e:
            self.stderr.write(f"There was an error {e}")
This command when executed will check if there is a superuser in the database and if not, create it and print the generated password.
Release script release.sh
It is recommended to have a release script that contains all commands to run after deployment, to avoid the need to run shell commands for tasks like creating superuser, migrations, etc.
In the root of the project create a file called release.sh. We will add this in Processes as a process called release.
Run script run.sh
Optional, but useful, let's create a script that runs our project when deployed.
Create a file called run.sh in the root of the project:
Please don't miss the last dash - in the gunicorn command.
Pushing code to GitHub
In the root of your project create a file .gitignore, which will prevent cluttering the git repo with files that shouldn't be there.
.venv/
.idea/
__pycache__/
*.py[cod]
*$py.class
.vscode/
.DS_Store
.AppleDouble
.LSOverride
.env
db.sqlite3
staticfiles/
media/
The last three lines matter: with the settings above, local development writes a SQLite database to db.sqlite3, collectstatic writes to staticfiles/, and uploads land in media/. None of those belong in git.
Initialize git repository and create initial commit:
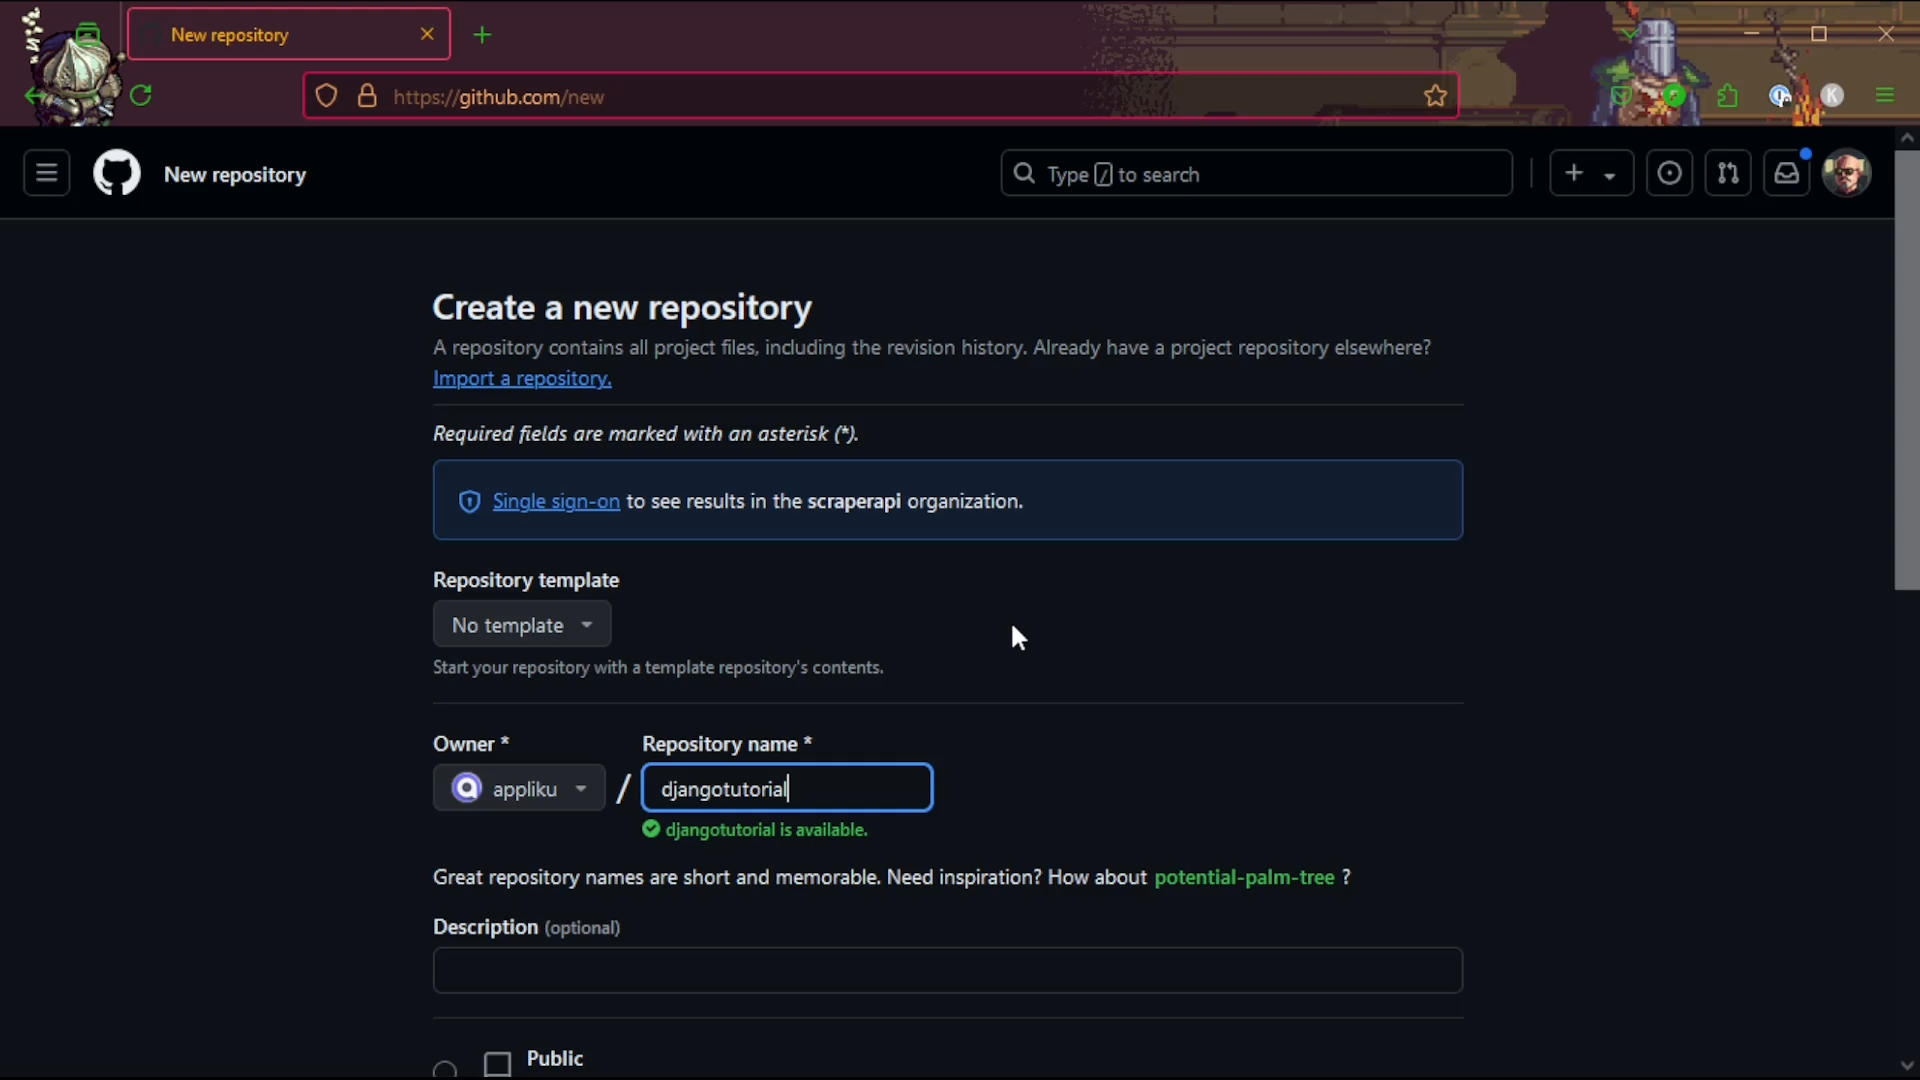
Go to GitHub.com and create a new repository.
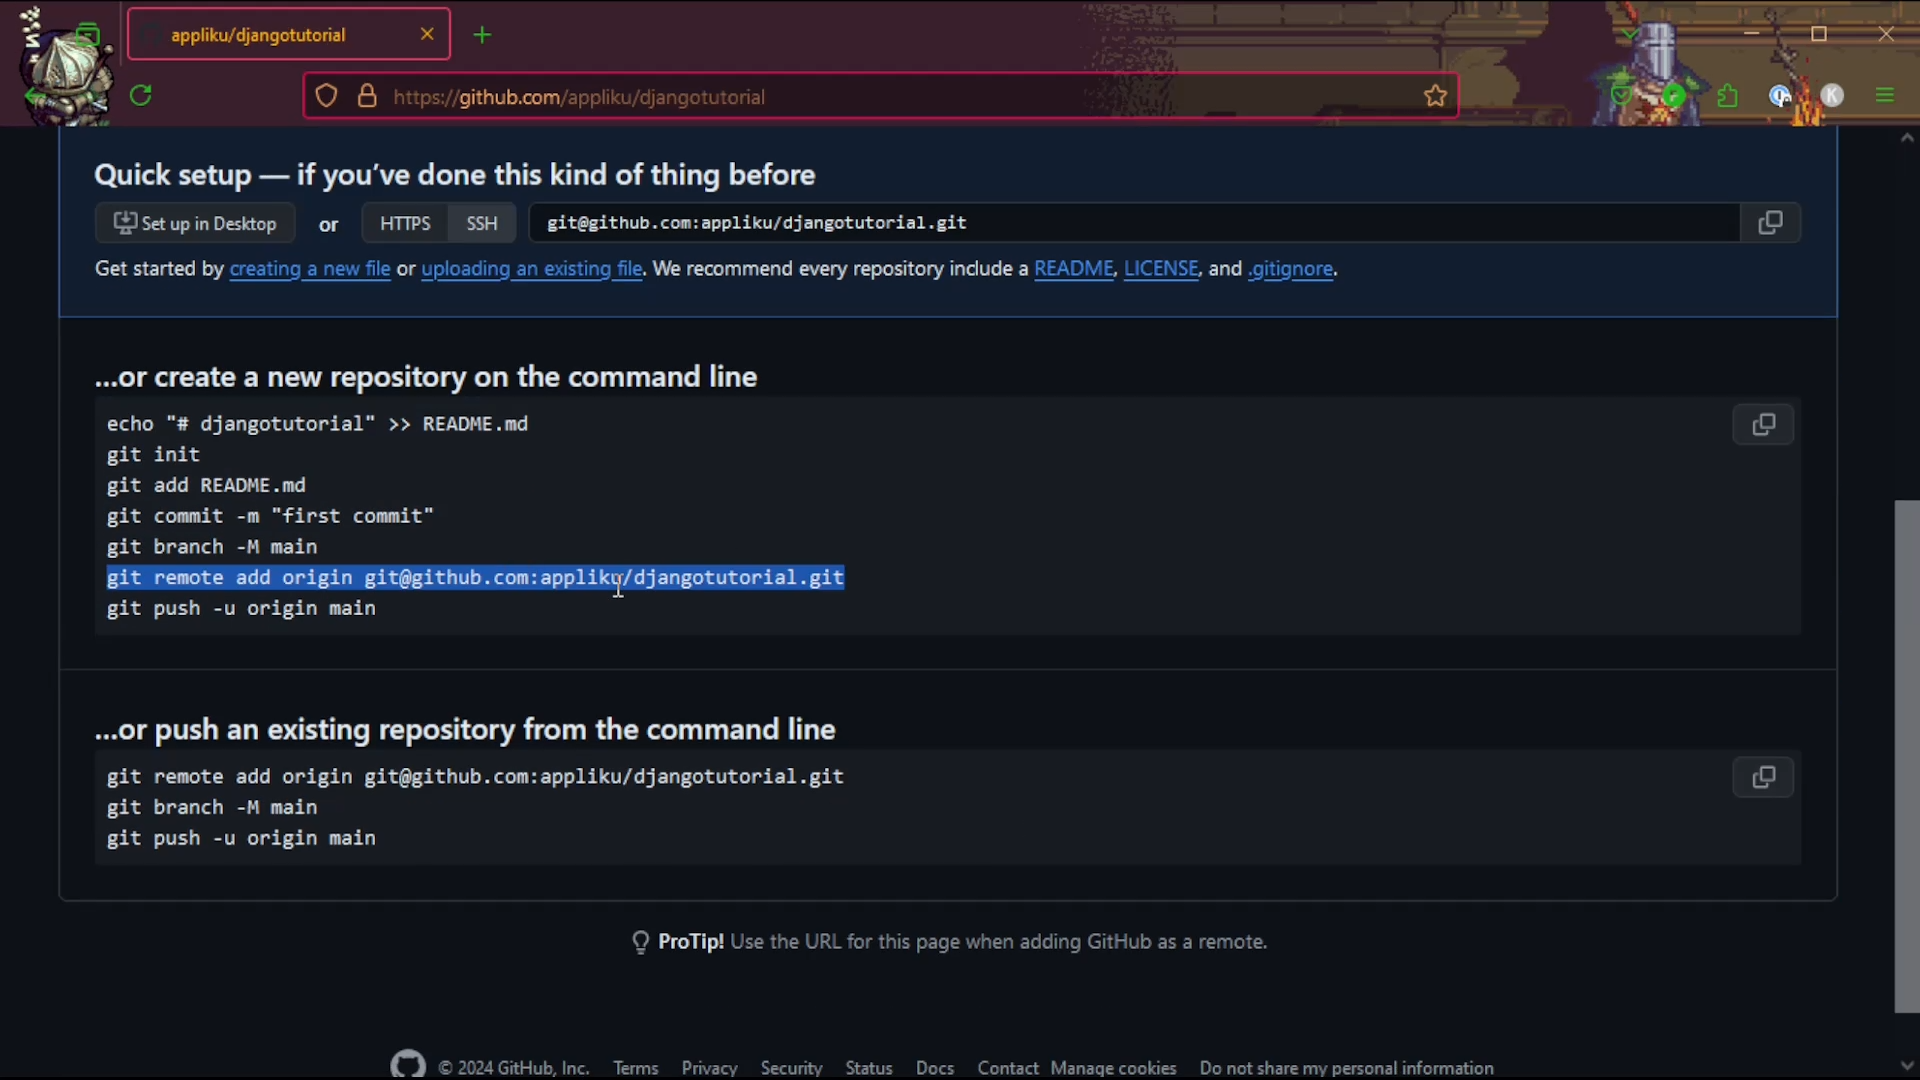
Copy the git remote add line and paste it in the terminal in the root of your project.
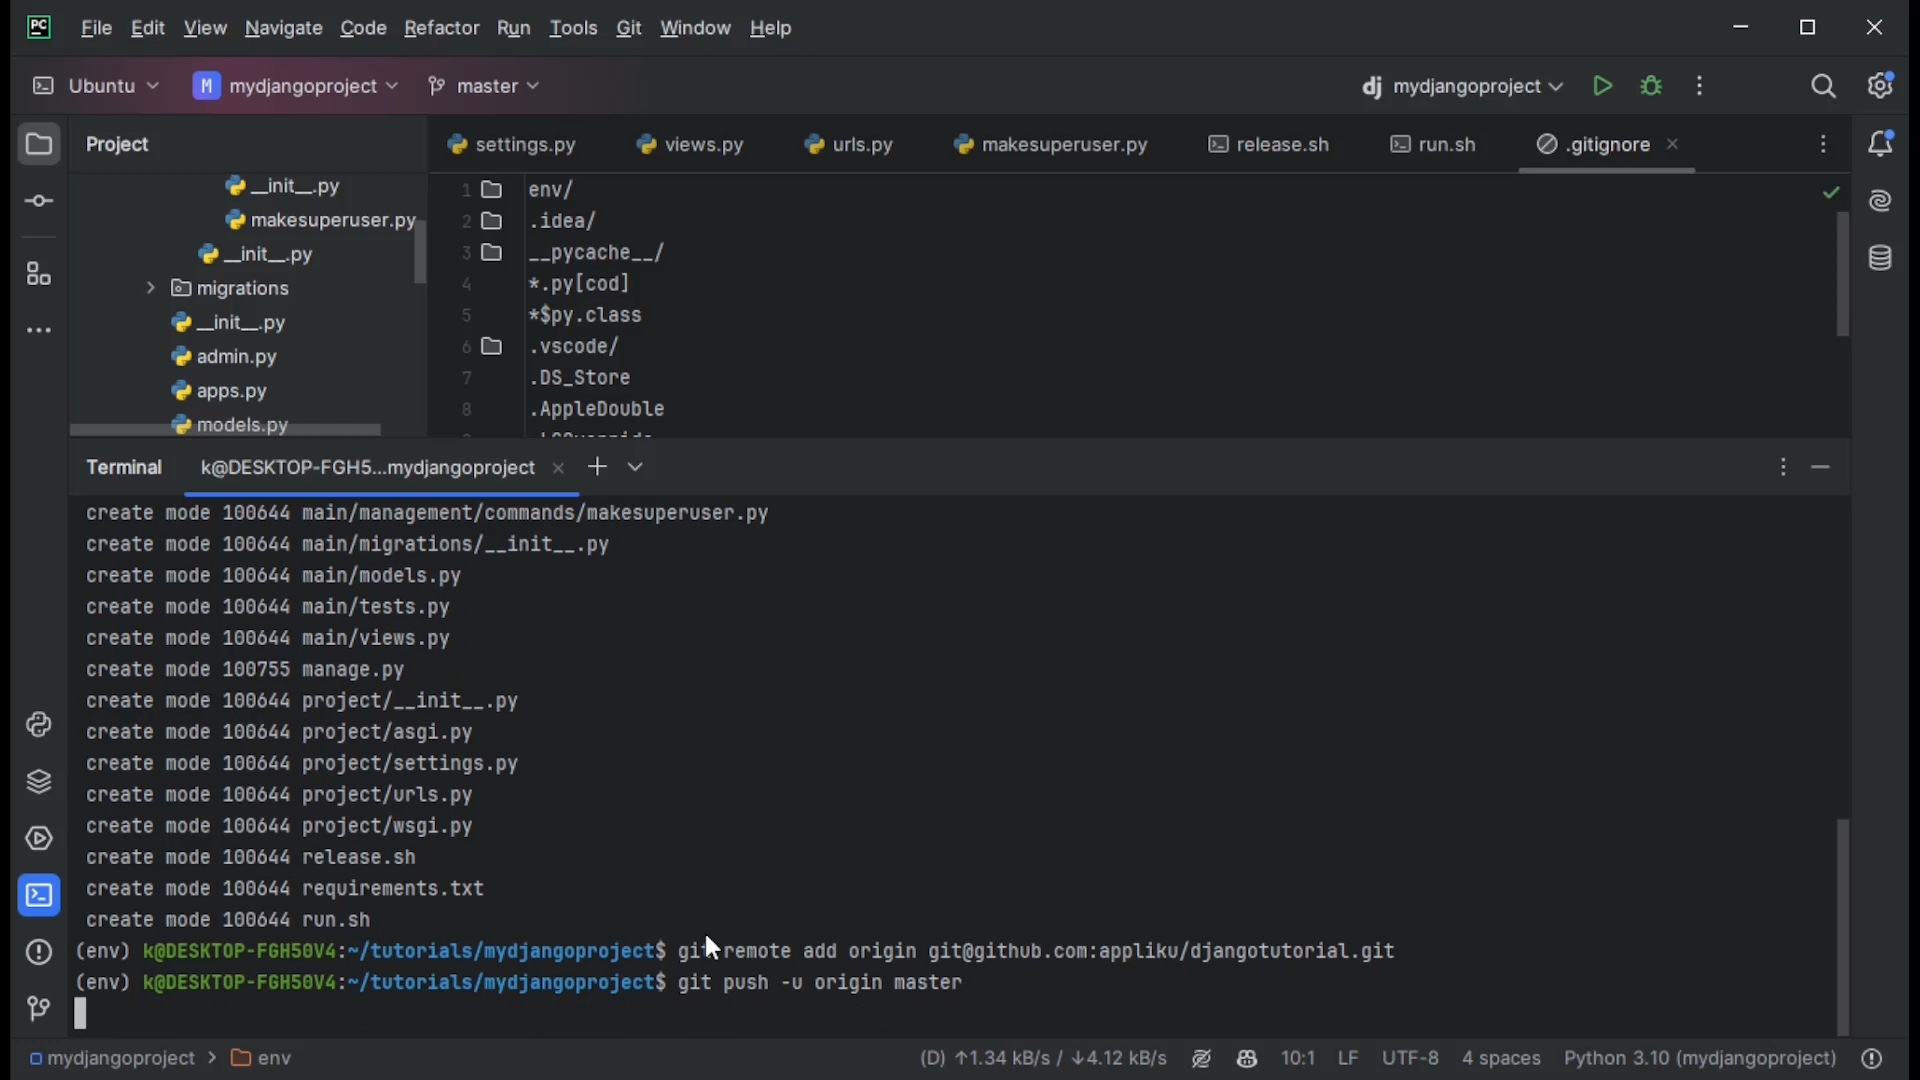
Then type git push -u origin master and this will push your code to GitHub.
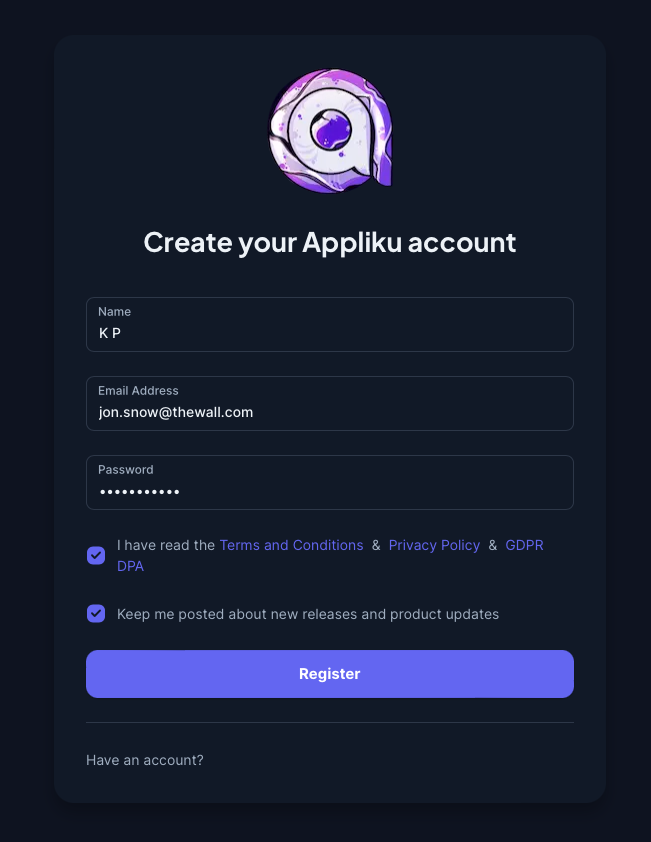
Appliku Account
If you don't already have an Appliku Account create it by going here: https://app.appliku.com/
Create a server in a cloud provider of your choice, then create an app.
Create Application
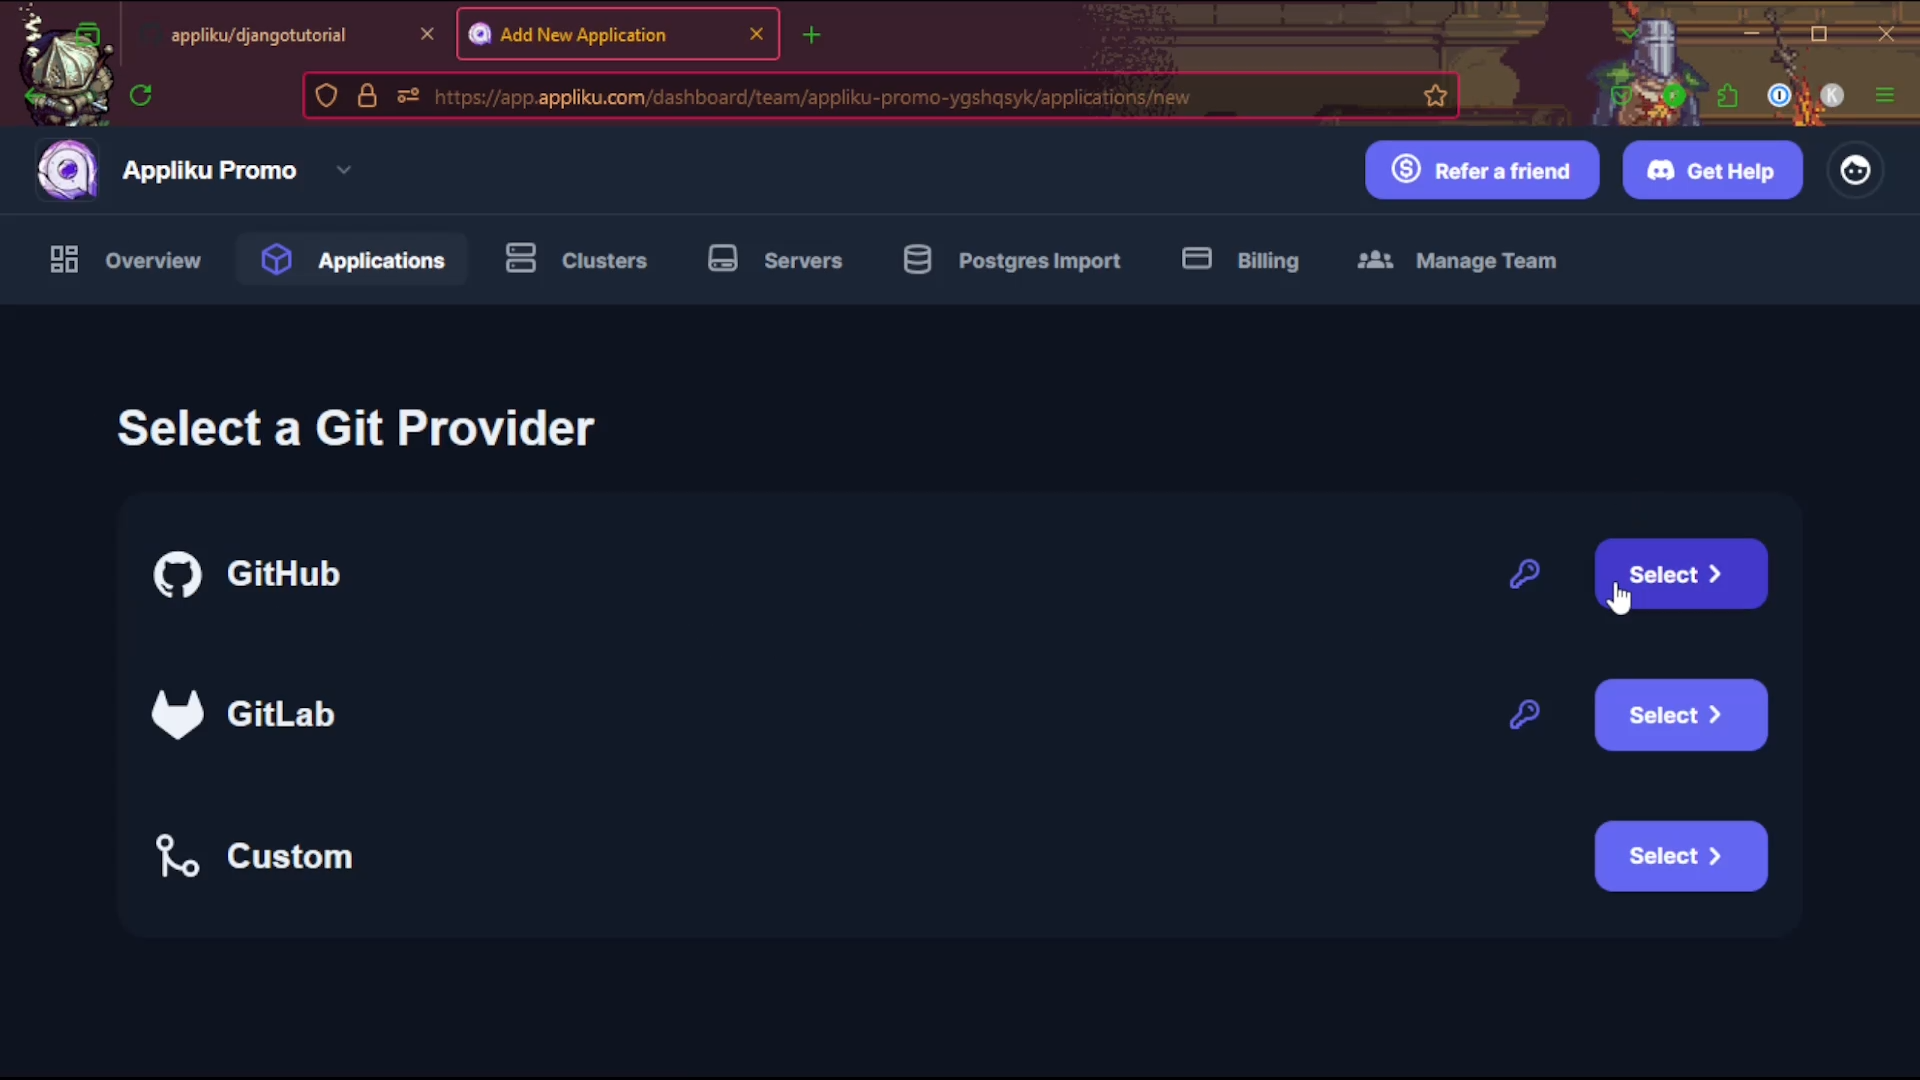
To create an application go to Applications menu, click "Add Application", select GitHub.
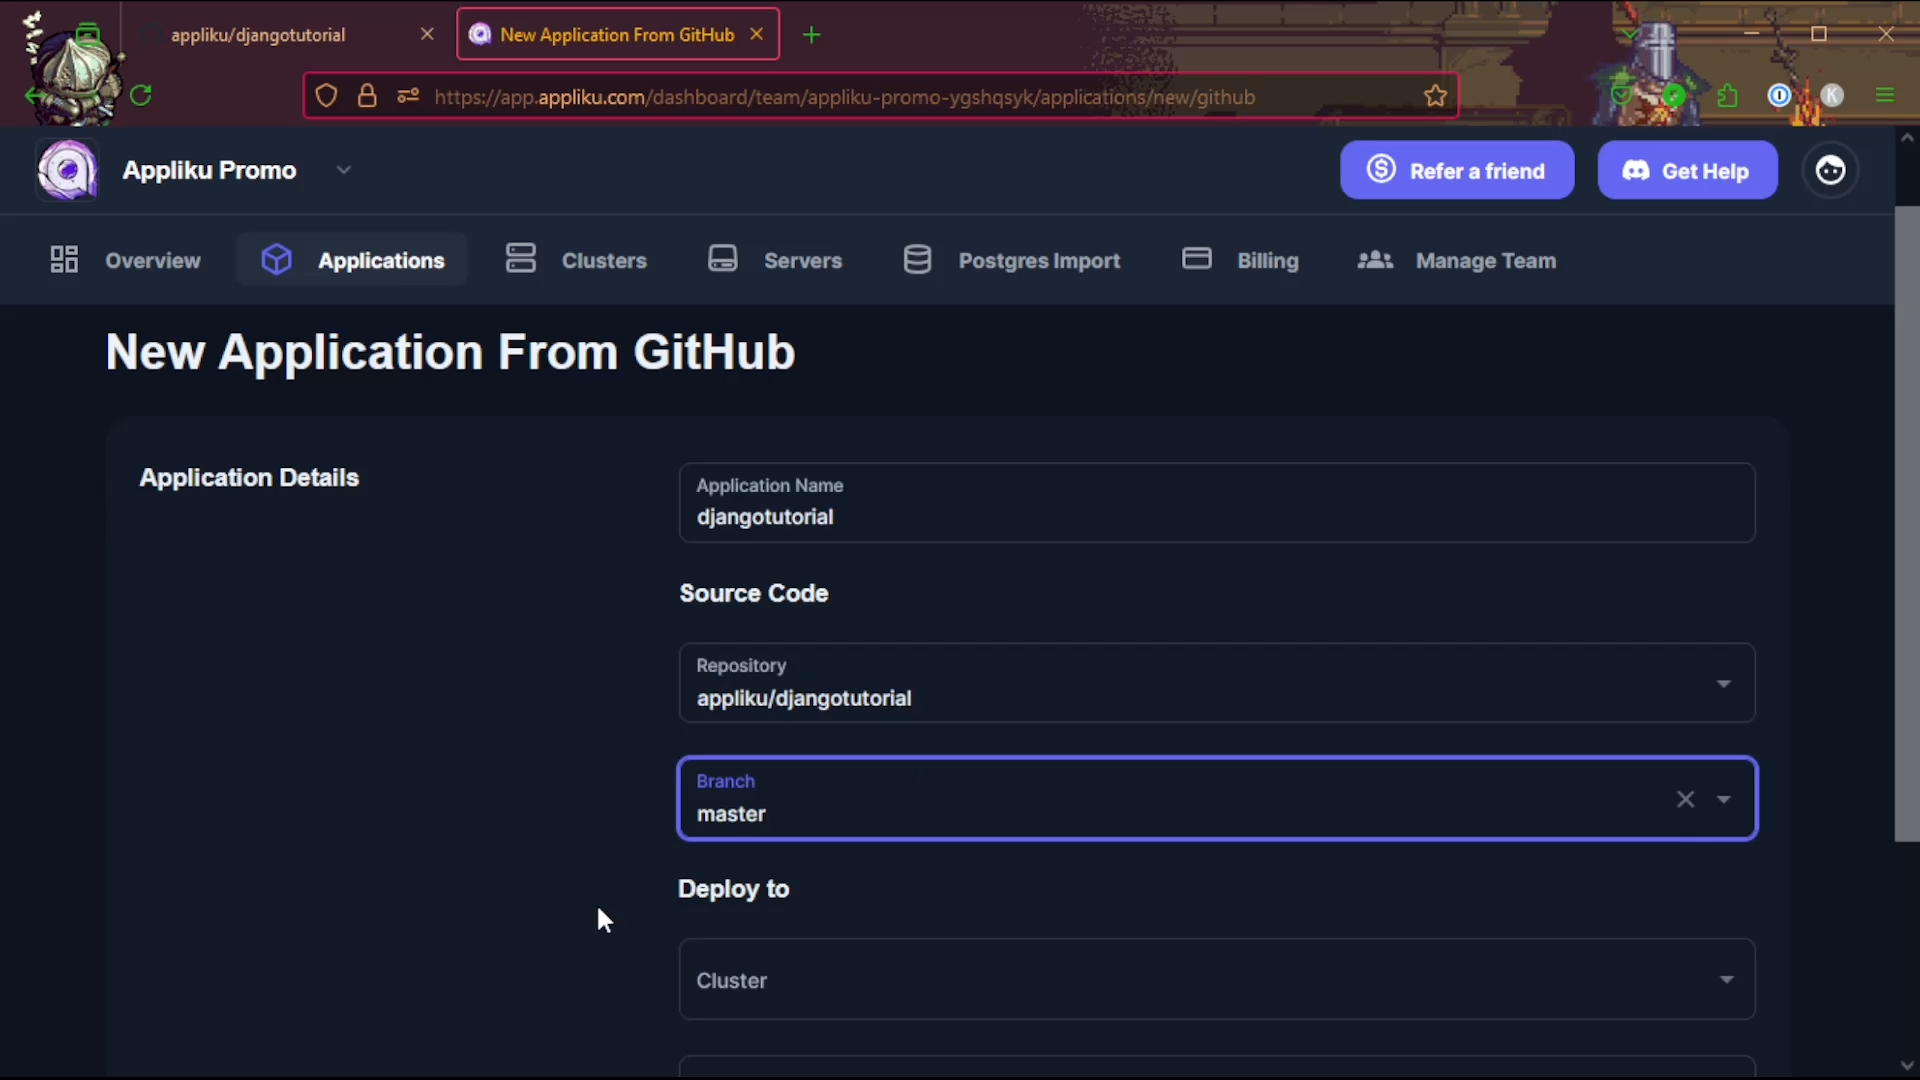
Give your application a name, select the repository, branch and your server, then click "Create Application".
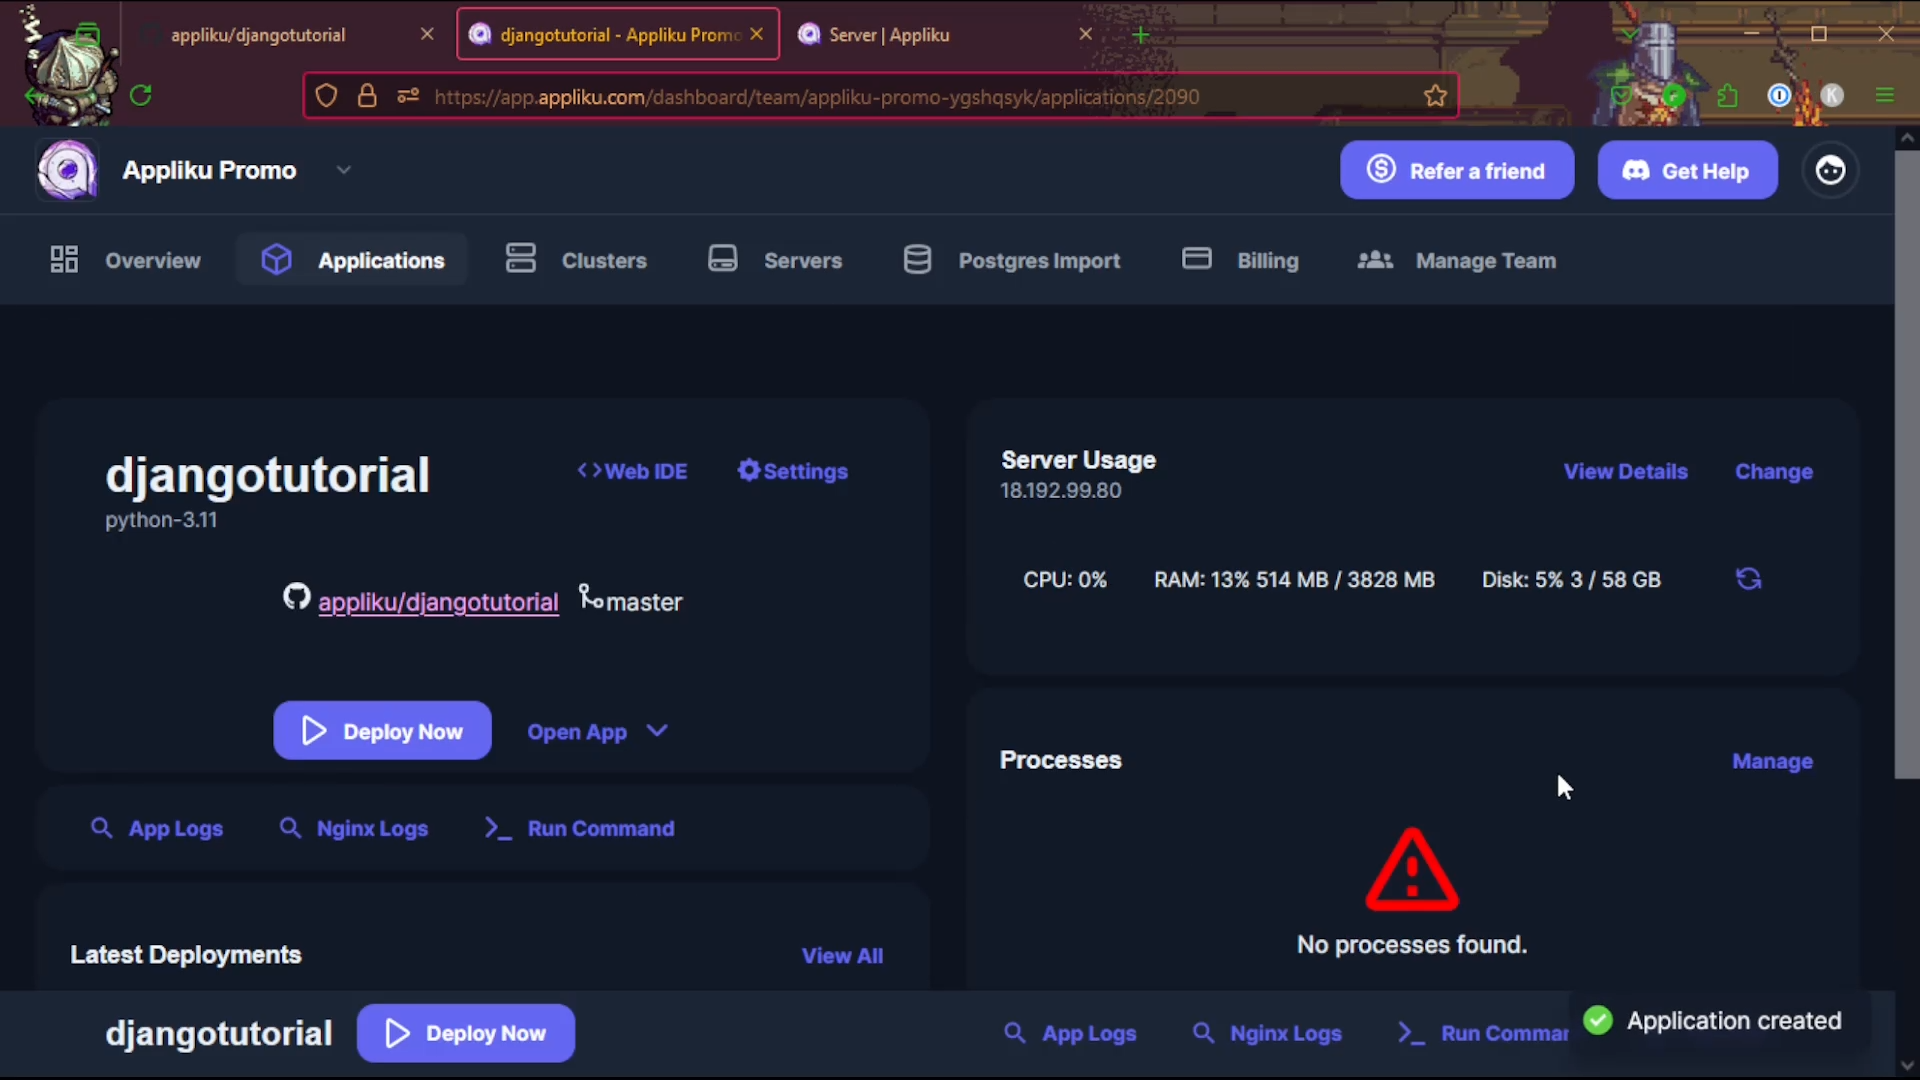
You will see the "Application overview page".
Adding a Postgres Database
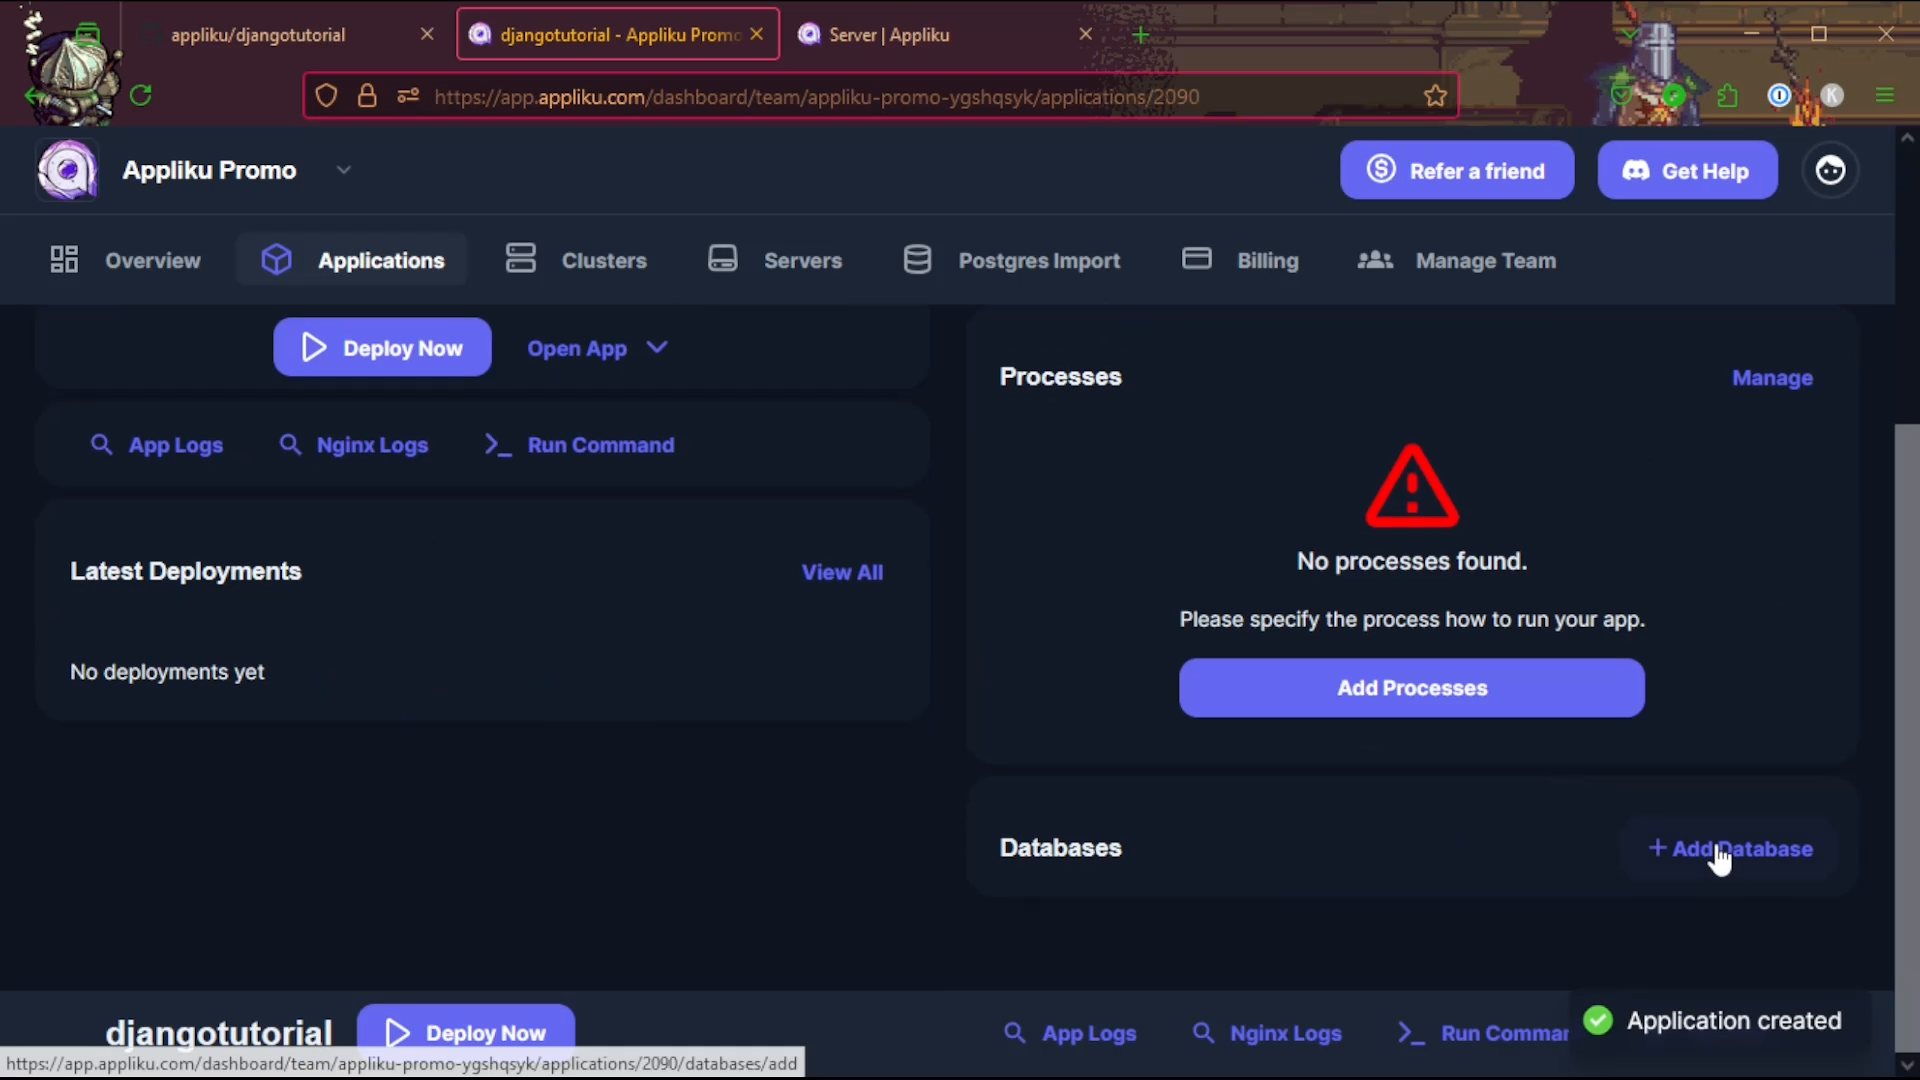
Scroll down and click on "Add Database".
Fill in the form:
- Name — anything you like, e.g.
db. - Database Type — pick the newest PostgreSQL version, PostgreSQL 18 + PostGIS at the time of writing. It is a regular PostgreSQL 18 with the PostGIS extension already installed and enabled, so you can ignore PostGIS entirely unless you are using GeoDjango.
- Configuration — a tuning preset for the database. "Small" is fine to start with; you can change it later.
- Server — the same server your app runs on. Only standalone servers (not part of a cluster) can host databases.
- Allow external connections — leave this off unless you need to connect to the database from your own machine. With it off, the database is only reachable from apps on the same server over the internal Docker network.
Then click "Create Database".
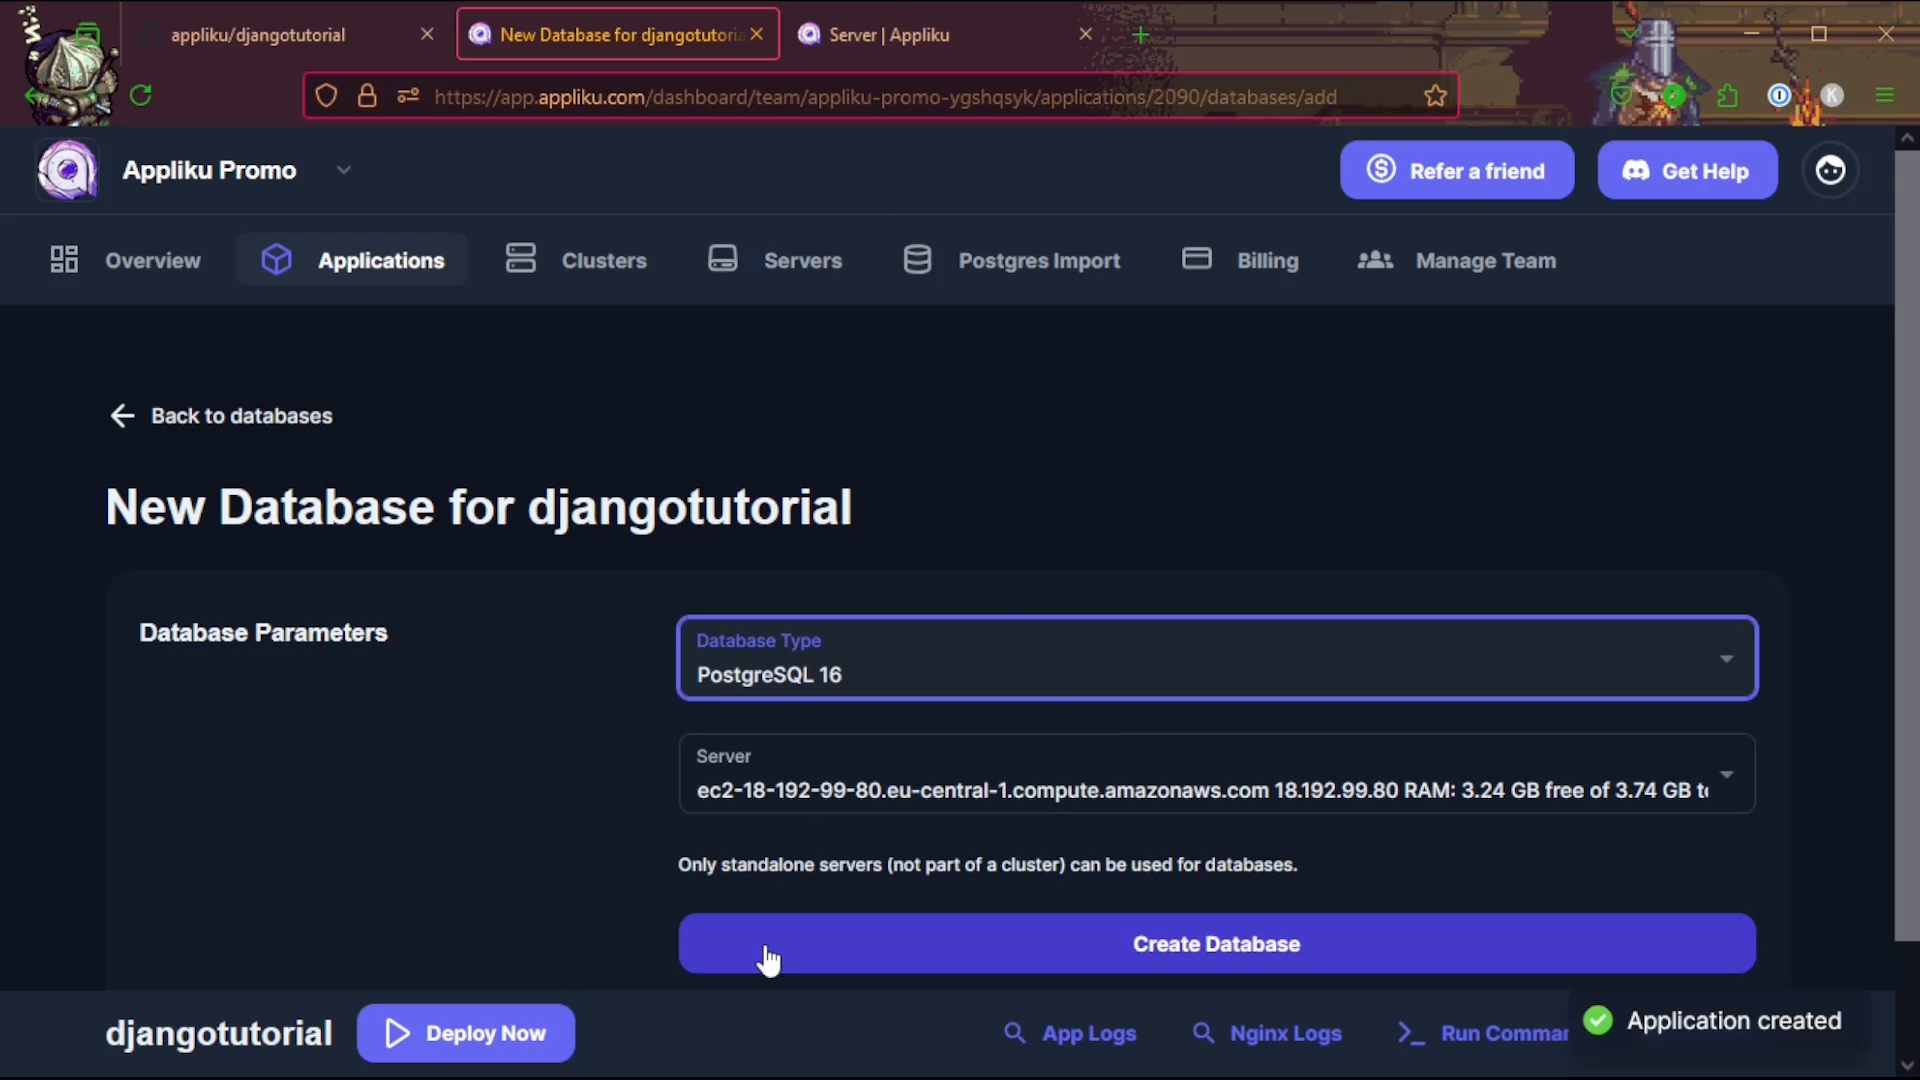
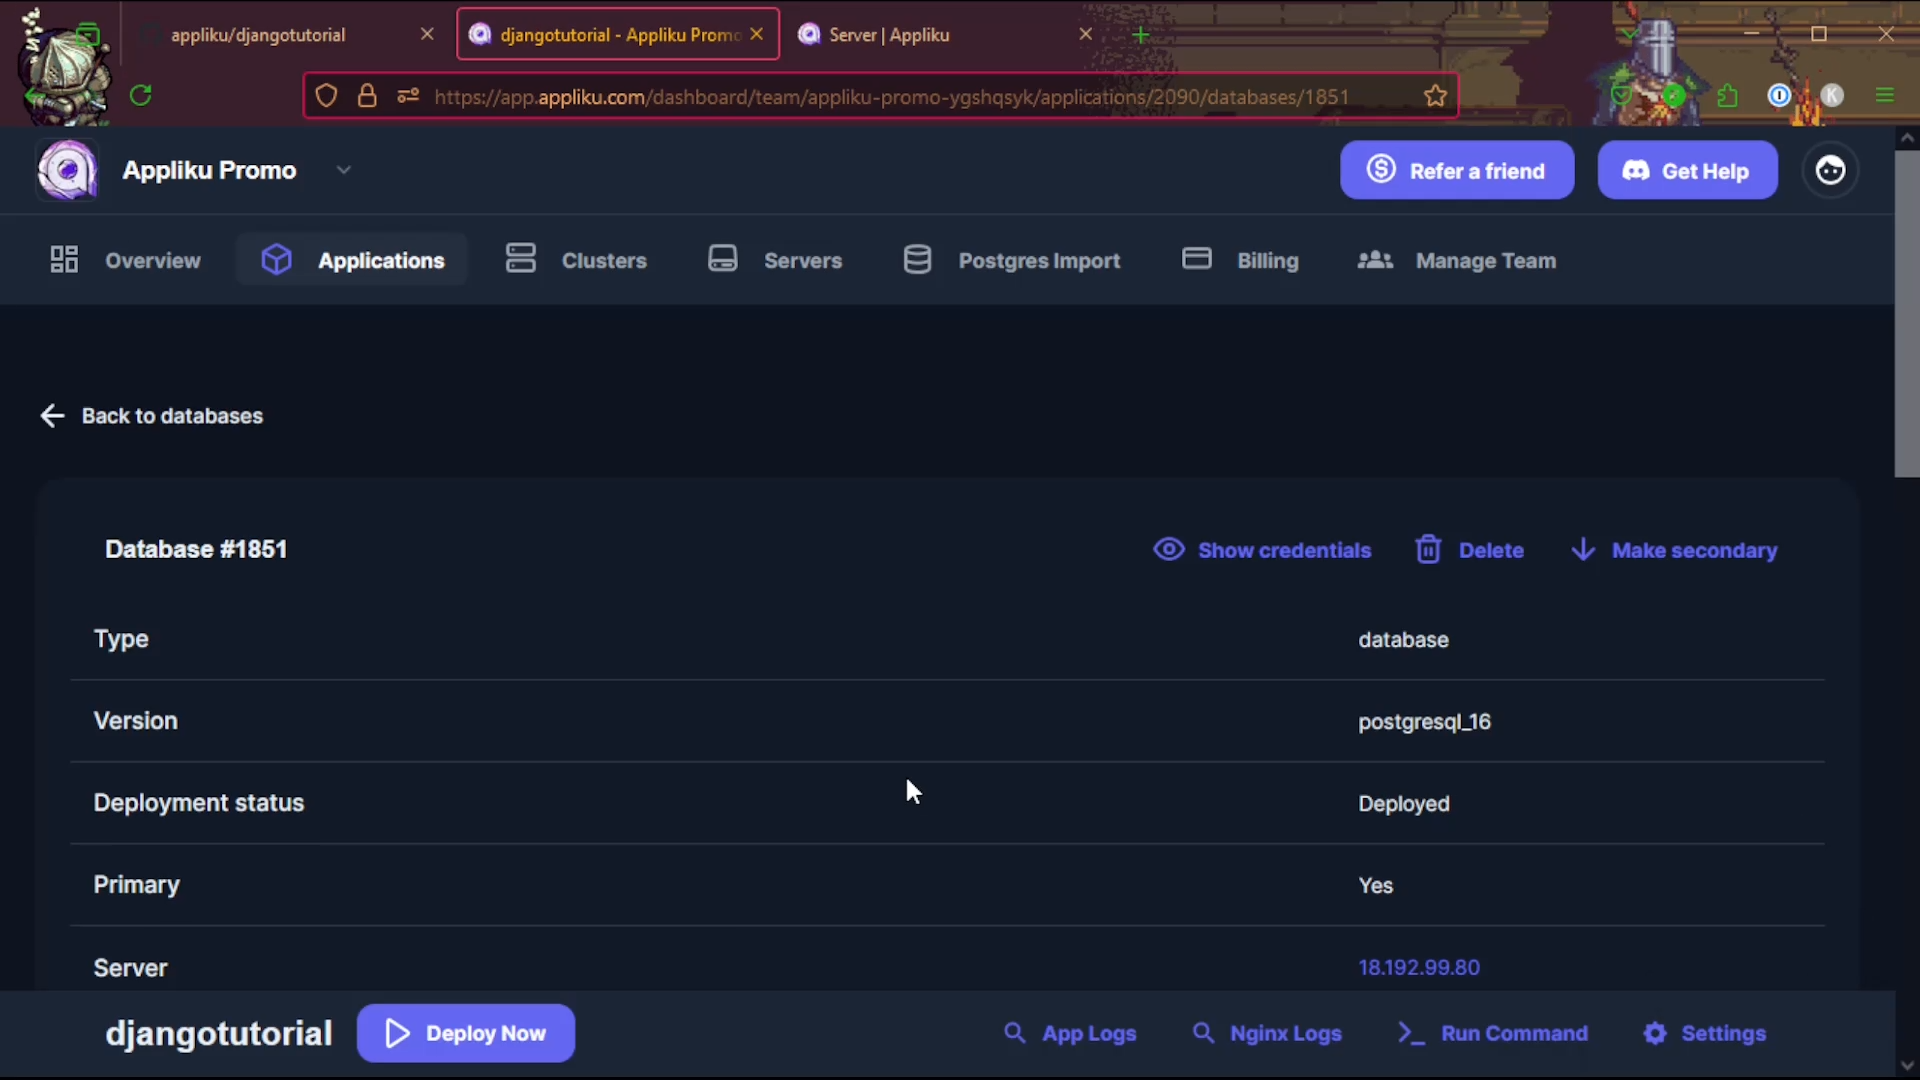
The first database you attach to an app becomes its default and is exposed to your app as a DATABASE_URL environment variable, which the env.db() call in settings.py picks up automatically — there is nothing else to configure. (Any additional databases you attach later get a suffixed variable like DATABASE_URL_1234 instead.)
When it shows "Deployed", go back to the Application overview page.
Build settings: Python 3.14 (uv)
Go to the "Build Settings" tab of your application and set the Build Image to Python 3.14 (uv). This is the image that runs uv sync --frozen against the pyproject.toml and uv.lock you committed earlier, and then runs collectstatic for you.
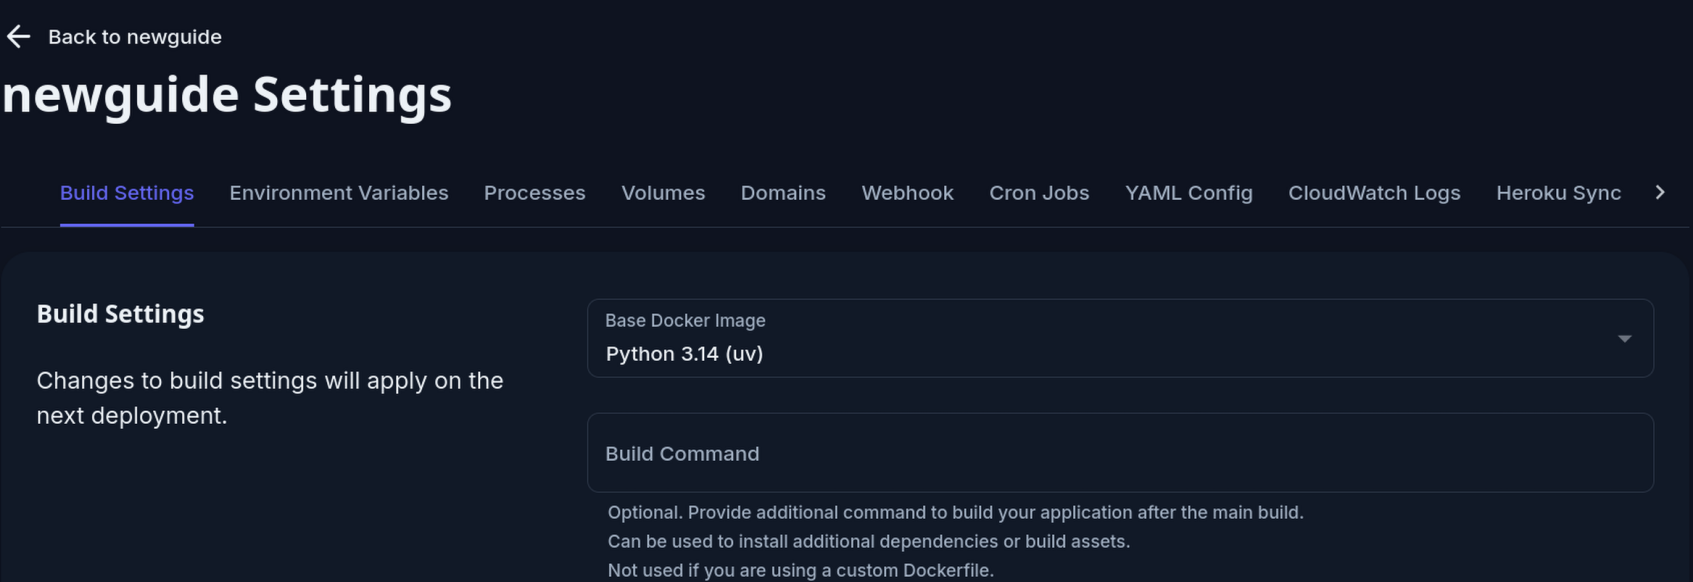
If your project also needs Node.js at build time (for a JS bundler, Tailwind, etc.), choose Python 3.14 (uv) + Node 25.6 instead. See Build Settings for the full list of options.
Adding processes
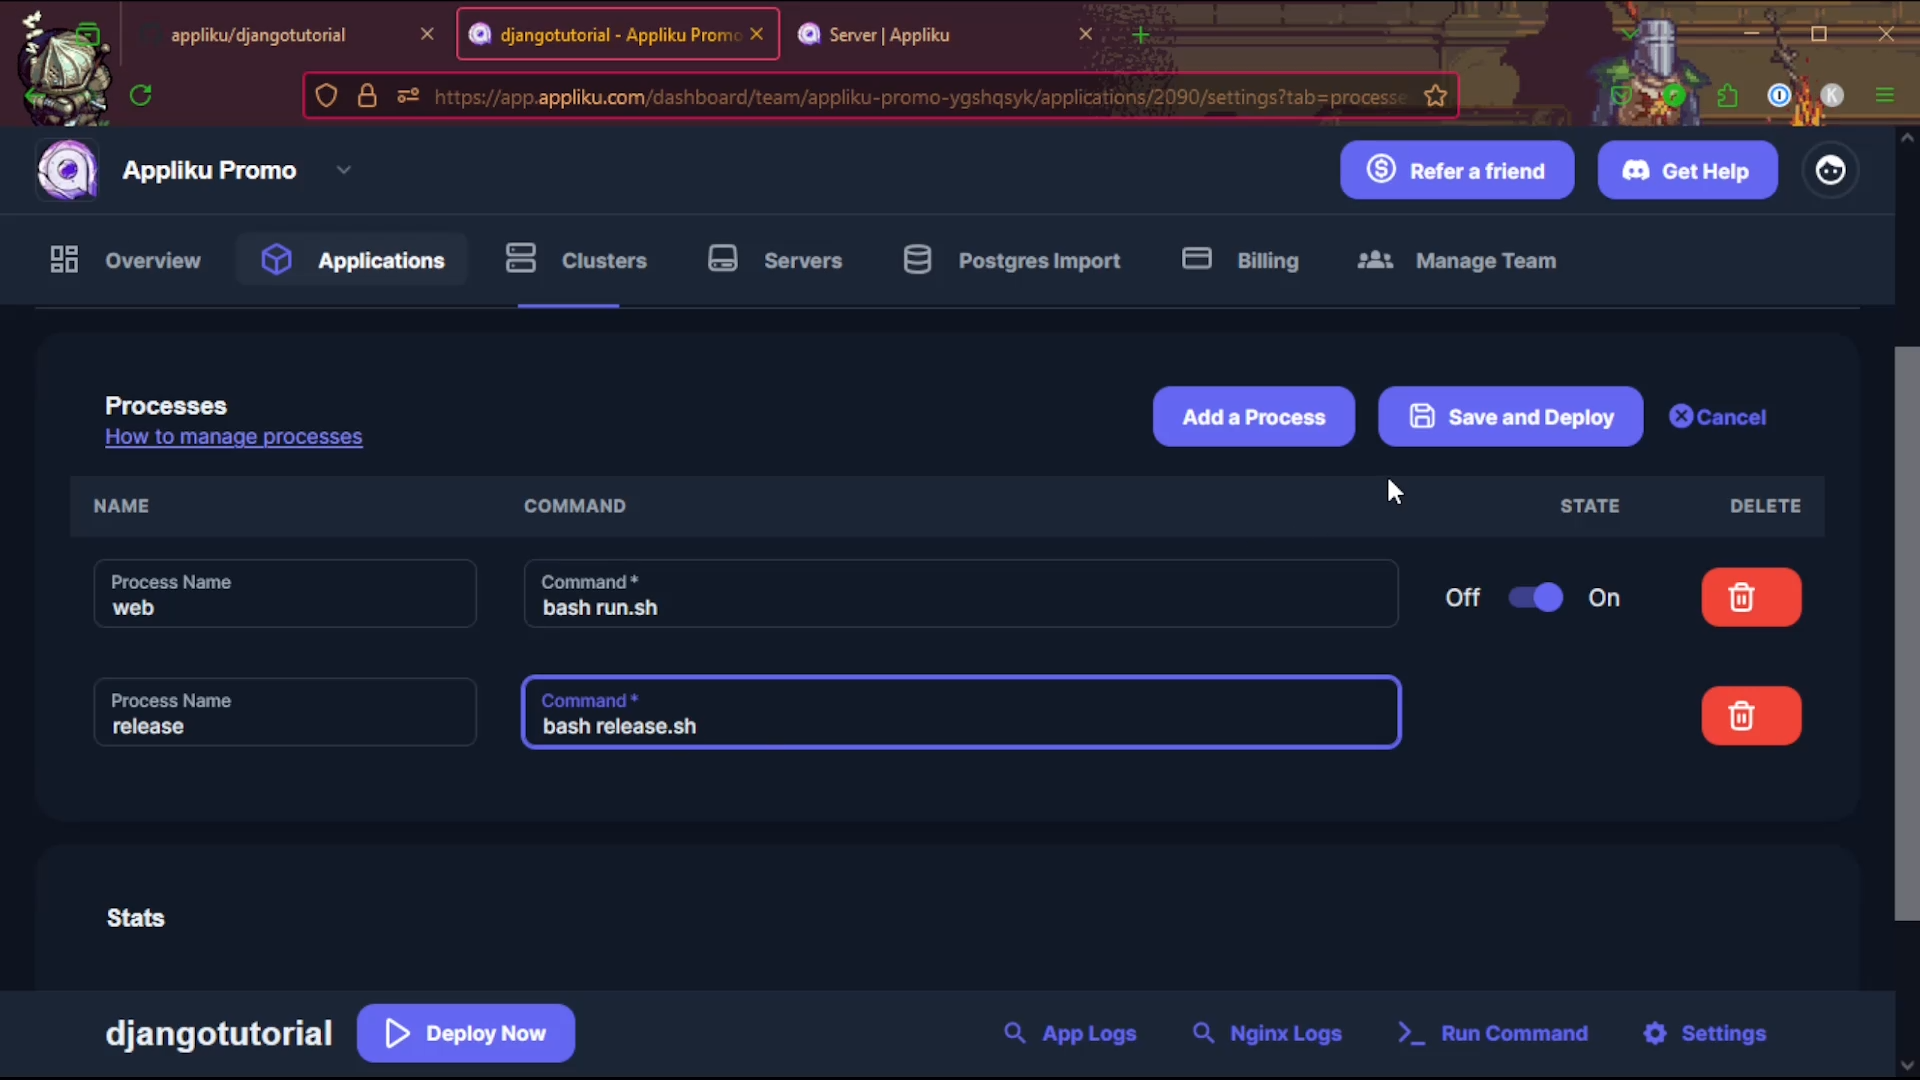
Click on the "Add Processes" button.
Add two processes:
- The first one MUST be called web and the command bash run.sh. web name is important, it is the process that responds to HTTP requests.
- The second process is also a special one, called release and it is a command that is executed after each successful deployment. Command for it must be bash release.sh.
Setting environment variables
Before you deploy, set your environment variables on the "Environment variables" tab. Do this first — otherwise your first deployment runs with the insecure settings.py defaults (SECRET_KEY=change_me and ALLOWED_HOSTS=*).
You should set SECRET_KEY to a long random value. Django ships a generator for it — run this locally and paste the output:
uv run python -c "from django.core.management.utils import get_random_secret_key; print(get_random_secret_key())"
Don't shorten it: Django's own manage.py check --deploy warns about keys under 50 characters.
The ALLOWED_HOSTS variable should be a comma-separated list WITHOUT WHITESPACES(!!) of domains through which your app is accessible.
When deployed with Appliku, your app receives a domain name YOUR_APP_NAME.applikuapp.com. You can disable this default subdomain on the "build settings" tab.
If you have added custom domains and you have multiple domains through which your app is accessible you should specify ALLOWED_HOSTS env var like this: djangotutorial.applikuapp.com,mysupersite.com,yetanotherchatgptwrapper.ai
With the processes and environment variables in place, hit the "save and deploy" button.
Add persistent volume
In order to make persistent volumes work, please go to the "Volumes" tab in application settings and add one with the following fields:
container path=/uploadsurl=/media/environment variable=MEDIA
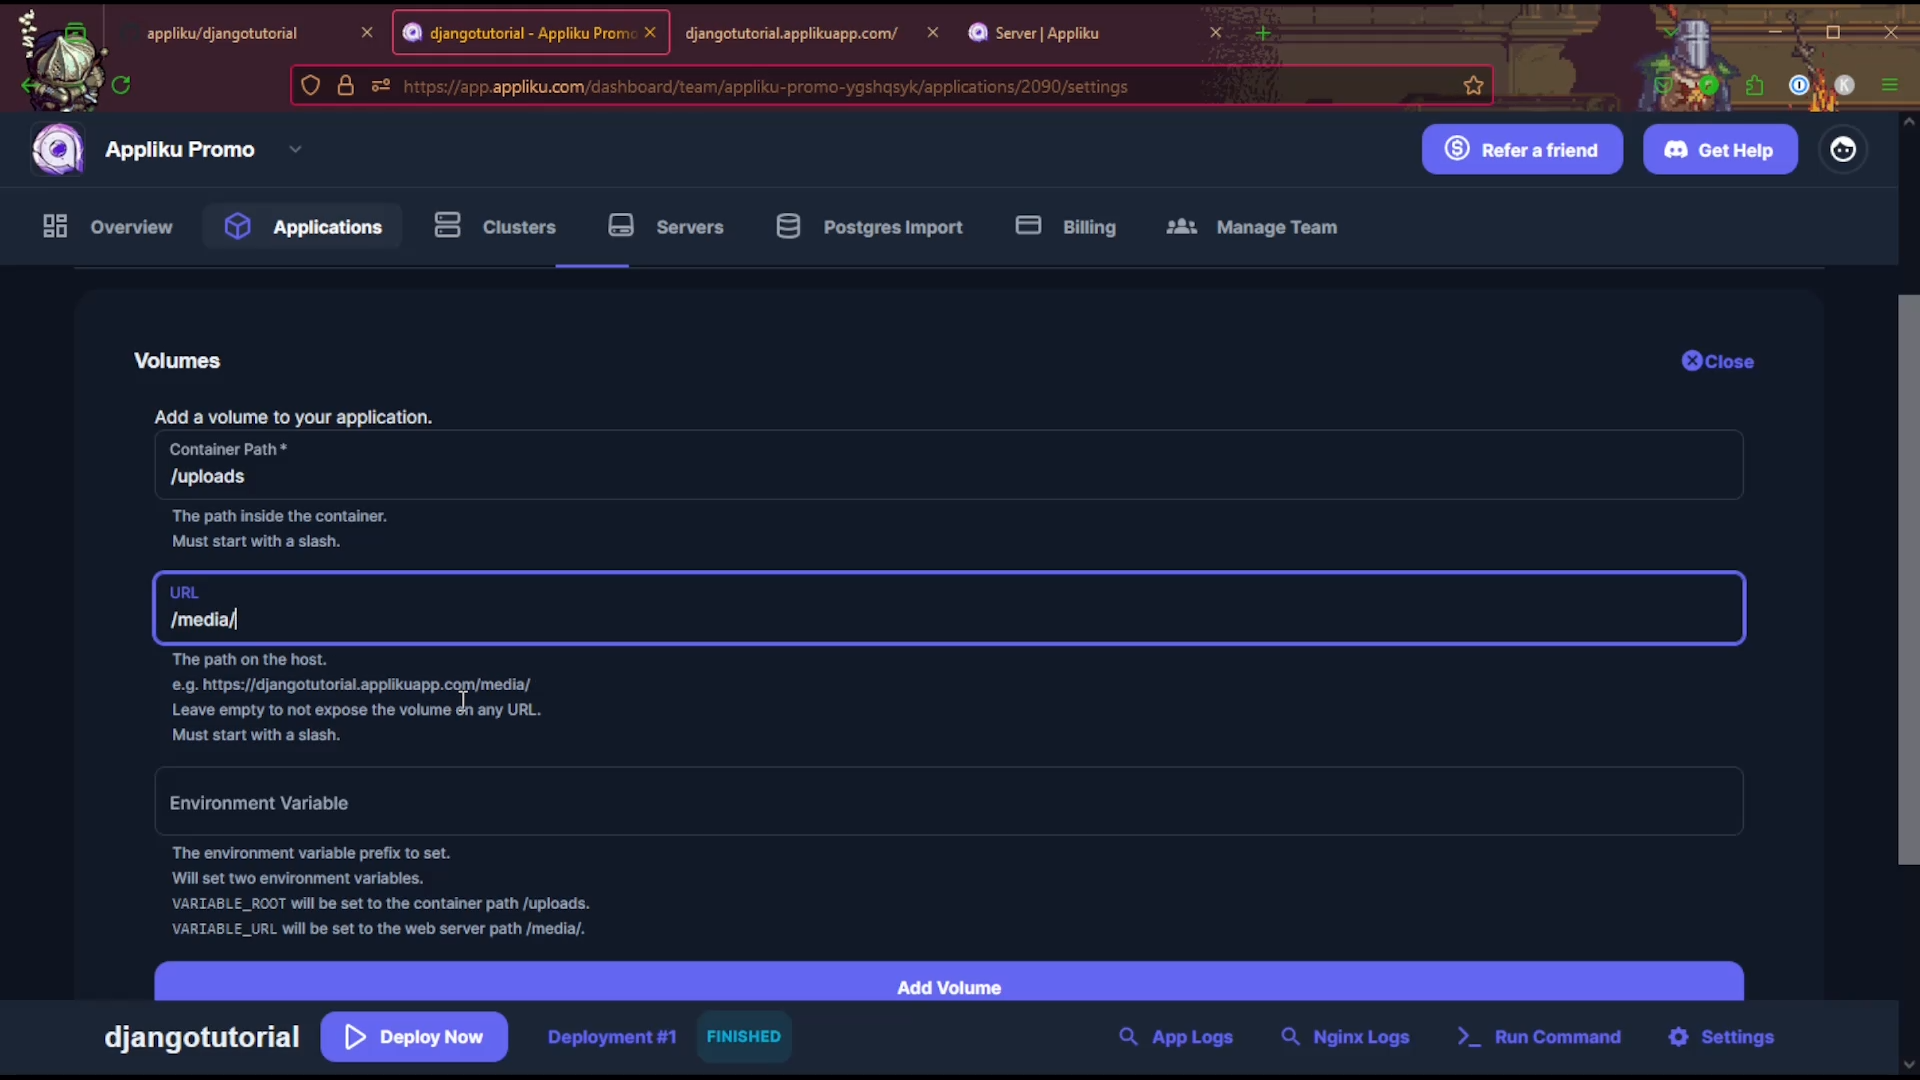
This creates two environment variables in your app, MEDIA_ROOT and MEDIA_URL, which the settings.py above already reads.
Also make sure "Update Nginx Configuration on deploy" is enabled on the "Build Settings" tab — without it, the /media/ URL will not be served by Nginx for your existing domains.
Deploy the app again after adding the volume. Volumes, their environment variables and the Nginx mapping are all applied during a deployment, so nothing changes until you redeploy.
Read more about volumes here: Persistent Volumes
Go back to the Application overview page.
You can click on "Open App" and it will show you a dropdown with all attached domains. Click on the default one and a page with your app will open saying "It works!".
Cheaper than Heroku
A Hetzner VPS + Appliku costs ~$15/month vs $140+/month on Heroku — same git-push deploys, your own infrastructure. See the full comparison →
Ready to Deploy?
Create your free Appliku account →
Already set up? Check out our guides for specific cloud providers: - Deploy Django on Hetzner Cloud - Deploy Django on DigitalOcean - Deploy Django on AWS EC2